Alt Feast

Offering alternative recipes without gluten, dairy, corn, or coconut

Author: TC

  • Trying Toran-guk (Taro soup)

    Trying Toran-guk (Taro soup)

    I had never had Korean taro root before.

    After ordering a bag of taro root that sat in my fridge for a month (I originally wanted to use them to cook Japanese satoimo nimono, but ran out of time), I decided to use them over the weekend to try something new.

    First off… Korean taro (and Japanese taro) is different to Chinese taro, which is the kind I am used to.

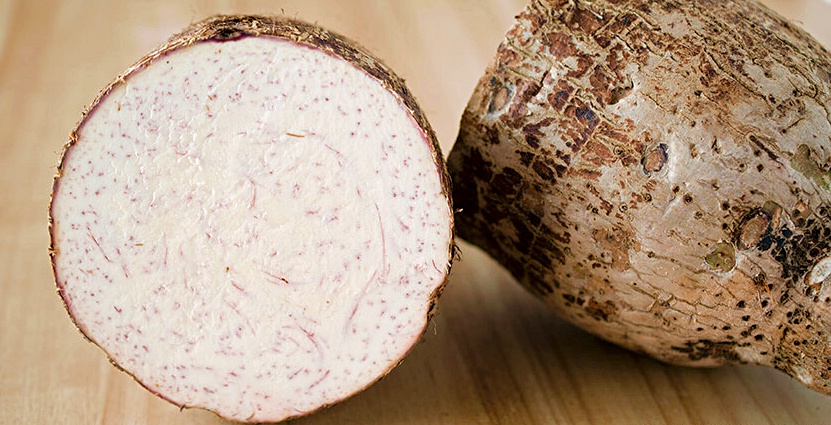
    Chinese taro is large, often the size of a large papaya. It has a thin brown bark-like skin and purple veins on the inside. When cooked, the white and purple colors of the flesh meld together to create a pale lavender-grey color. The texture is like a potato, but creamier and is served sliced and stewed with meat or mashed into a sweet dessert (yes, it is a savory and a sweet food option).

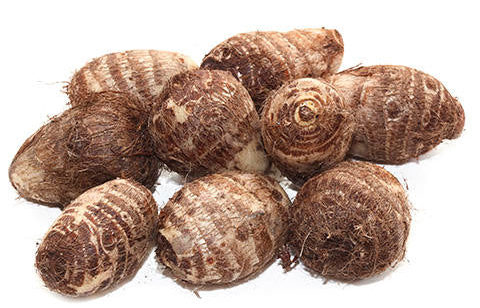
    Korean taro, on the other hand, are small, fitting into the palm of your hands. The skin is a hard bark and hairy like a coconut and the flesh is pure white. When cooked, the taro flesh is starchy like a potato, but also slimy like okra. It is more “yam”-like (think nagaimo) than the Chinese counterpart.

    chinese taro root
    Chinese taro root are large and have purple veins running through its white flesh.
    Small taro root
    Korean taro roots (and Japanese variety too) are small and have coconut-type hairs covering the outside.

    Both varieties are pretty toxic when raw and even irritate the skin if not handled properly (though i think the smaller hairier ones irritate skin more than the large one). Once cooked though, the toxins are cooked out and it’s perfectly safe to eat. In fact, it is known to be one of the earliest cultivated plants for consumption.

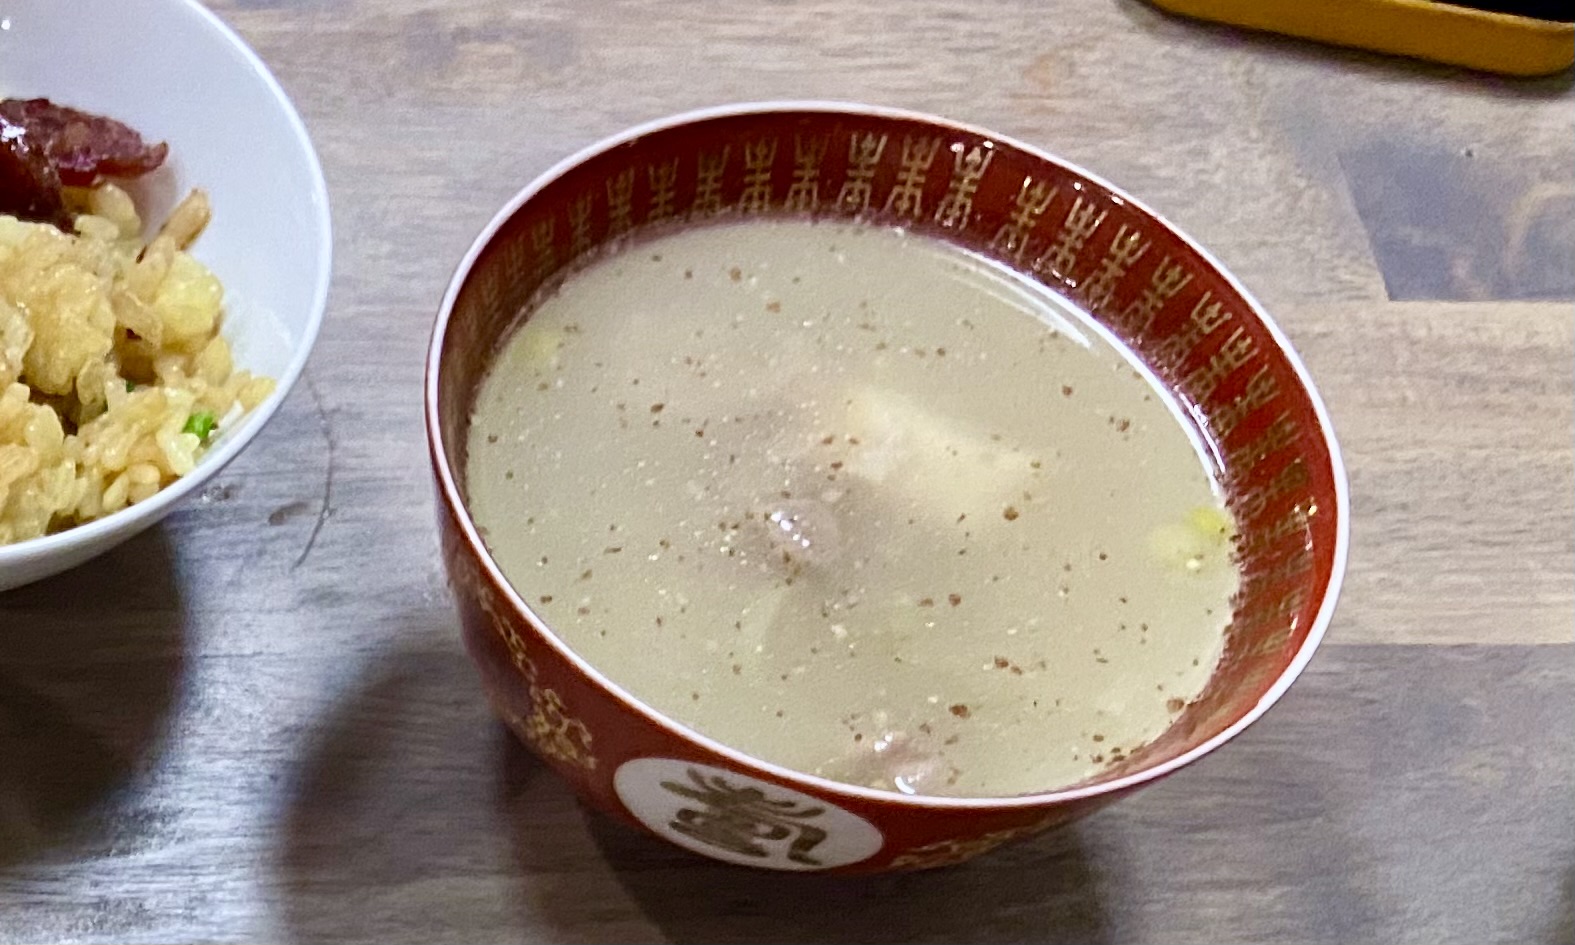
    I followed a recipe for Taro Soup by Maangchi in order to try this root vegetable. The soup itself was fairly basic: taro, beef, garlic, water, salt, fish sauce, green onion, and most importantly perilla seed powder.

    This was also my first time cooking with only perilla seed powder as the flavoring agent. Perilla seeds (or shiso seeds) are a common Korean spice, but outside of gamjatang (pork neck bone stew), I hadn’t really seen it used in any recipes. Out of the bag it smells… odd, so I wasn’t expecting the soup to taste so good!

    Perilla seeds definitely have their own distinct flavor and Maangchi’s recipe does call for a lot of it. It’s nutty, but also has this top-of-mouth flavor that I can’t quite distinguish. Once you get past the new-ness of the flavor, the soup is really tasty and the taro makes it quite hearty-feeling.

    My soup turned out a bit… murky though. I can’t decide if it was due to not soaking the beef first (therefore removing the blood) or if it was due to my perilla seeds. Maangchi’s recipe calls for perilla seed powder, whereas I only had whole perilla seeds, so I ground my own in a mortar for this soup. The powder itself was pretty brown in color. Maybe store-bought perilla seed powder has less of the husk and is therefore whiter in color.

    I will try this again one day and see if I can get that more pure white color that she depicts in her photos.

  • Potato Starch Noodle Stir Fry (Japchae)

    Potato Starch Noodle Stir Fry (Japchae)

    One of my favorite sides to order at a restaurant. I’m happily surprised at how easy it is to make at home. The recipe for Japchae takes your standard stir fry dish, adds flavored tare, and adds potato starch noodles.

    Potato starch noodles are, by default, gluten free! But like all packaged noodles, be sure to check the ingredients list. I have less trouble with this when buying Korean-brand potato starch noodles, but Chinese brands can have varietals that also include corn starch (whether that corn starch is used in the noodles themselves or are just dusted on the outside for noodle separation in the packaging I can’t be 100% sure).

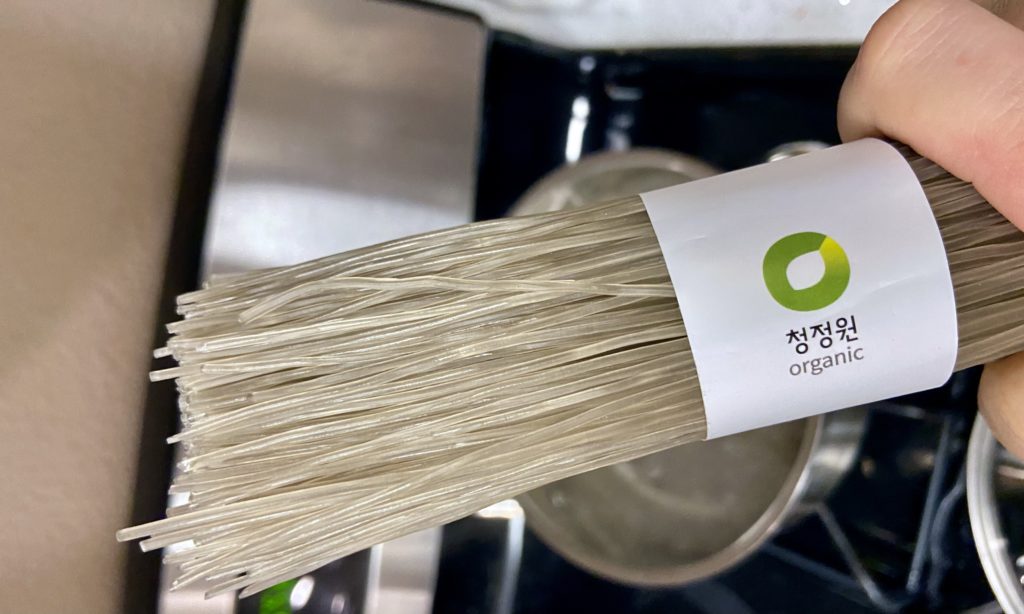
    organic packaged potato starch noodles
    Korean brands of potato starch noodles even offer organic options.
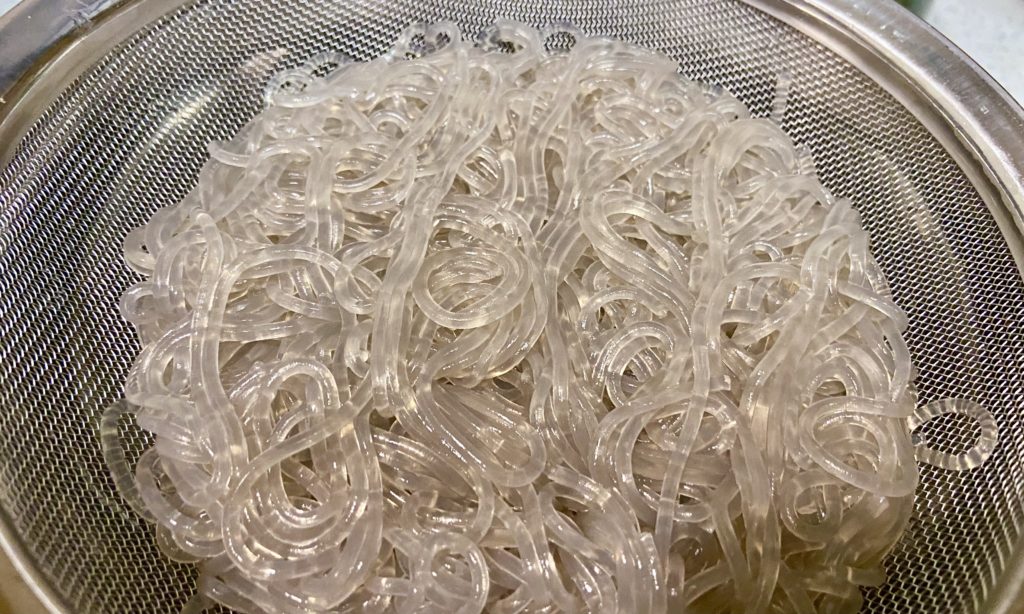
    boiled potato starch noodles
    Once boiled, potato starch noodles expand slightly and become slippery and chewy.

    For the homemade version, I used less soy sauce and less sweetener to “lighten it up” a bit. I also swapped the sugar for maple syrup, which does not alter the flavor at all in this recipe (maple is too mild a flavor compared to soy sauce or garlic).

    As for serving, I’ve seen this eaten as a main and a side dish. Just depends what kind of mood you’re in. 😉

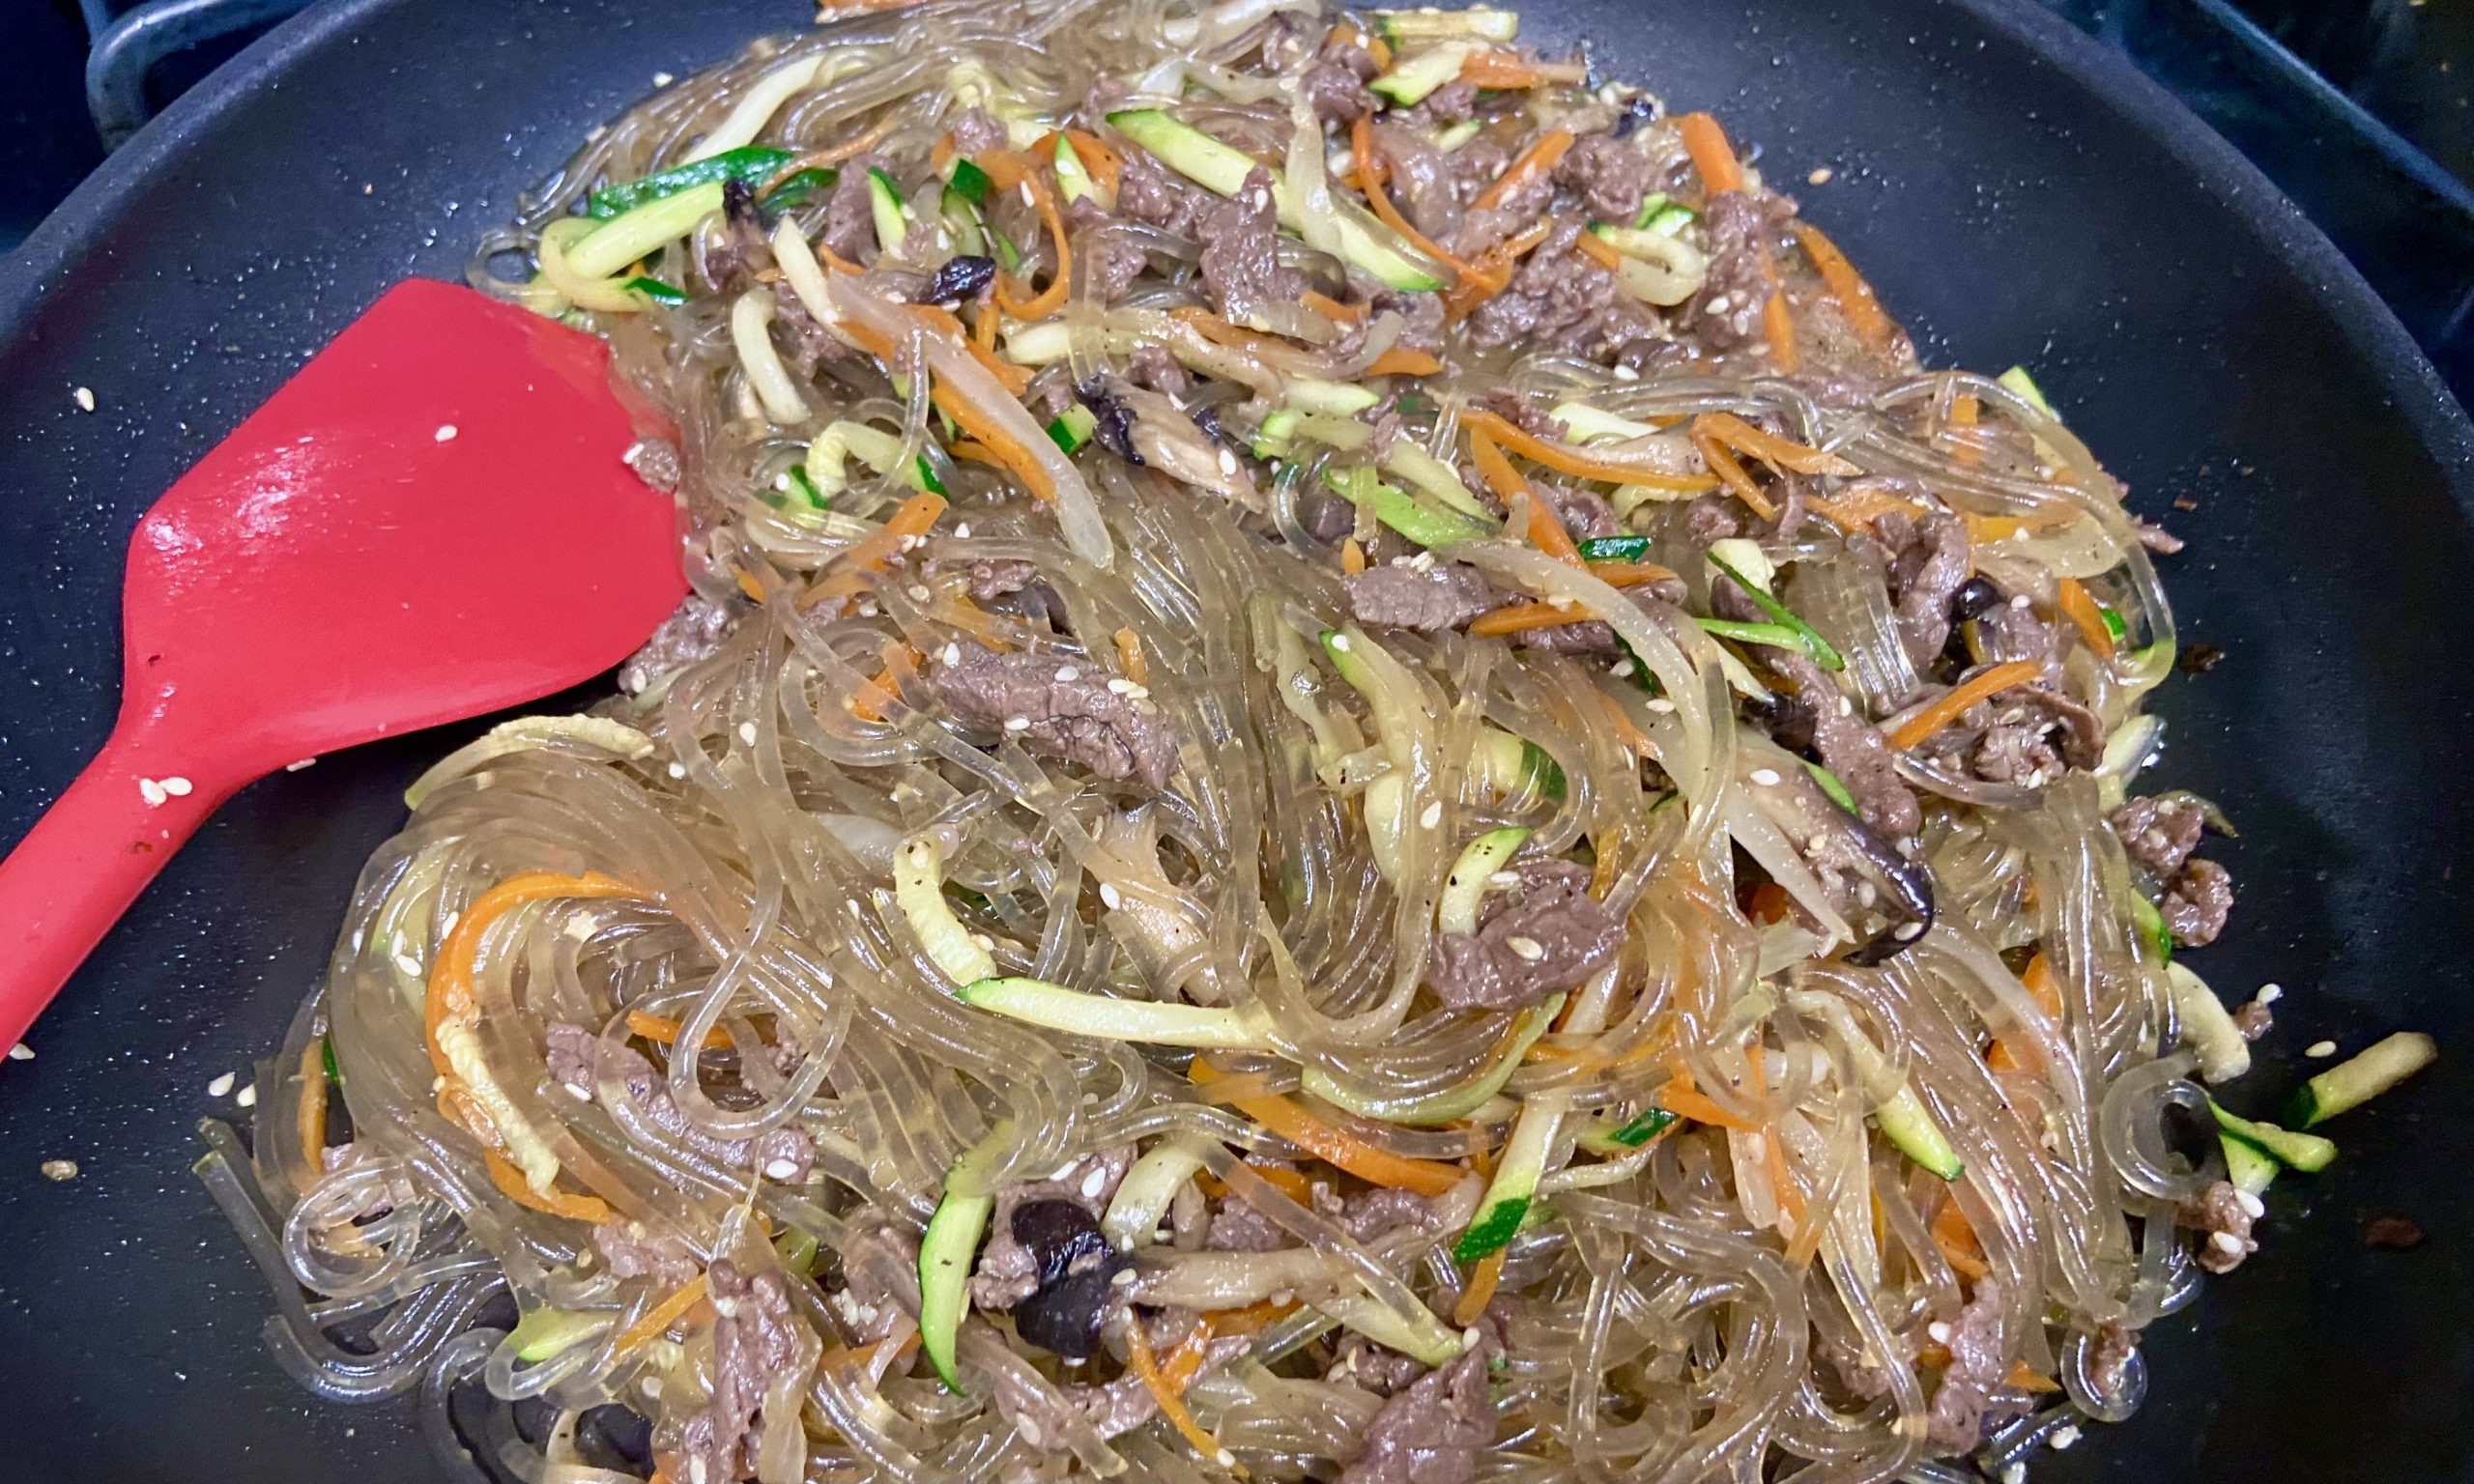
    Jap chae with beef

    Jap Chae (Korean potato starch noodle stir fry)

    A gluten free stir fry noodle dish that's has a chewy bite. A very popular dish in Korean restaurants.
    Prep Time 10 minutes
    Cook Time 10 minutes
    Course Main Course, Side Dish
    Cuisine Korean
    Servings 4

    Equipment

    • 1 large pot for boiling noodles
    • 1 large non-stick pan for stir frying

    Ingredients
      

    • 1 bundle Korean potato starch noodles approx 4 oz (1/4 lb)
    • 1 julienned carrot
    • 1/4 cup sliced onion
    • 1/2 cup julienned zucchini other green vegetables also work, including spinach
    • 4 oz beef i.e. sirloin, rib eye, etc
    • 1/4 cup sliced mushrooms i.e. oyster mushrooms, king oyster, shiitake, shimeji
    • 2 green onions cut into 2-in strips
    • 1 TBSP olive oil or other oil of choice

    Japchae Sauce

    • 2 TBSP gluten free tamari or use soy sauce if you can tolerate gluten
    • 2 TBSP maple syrup or other sweetener of choice
    • 2 TBSP sesame oil
    • 2 tsp garlic powder or fresh minced garlic
    • 1 TBSP roasted sesame seeds
    • 2 TBSP sake
    • 1 pinch black pepper or to taste

    Instructions
     

    Prep Steps

    • In a large pot, boil water and add the potato starch noodles to cook per package instructions (approx 6 minutes boiling). Strain the water, rinse under cold water, and set the noodles aside.
      1 bundle Korean potato starch noodles
    • If you're vegetables aren't sliced already, slice the onion, julienne the carrot and zucchini, and cut the mushrooms to match the matchstick size of the other vegetables as best as possible (this will depend what mushroom you're using. For oyster mushrooms, use your hands to tear the mushrooms lengthwise into strips).
      1 julienned carrot, 1/4 cup sliced onion, 1/2 cup julienned zucchini, 1/4 cup sliced mushrooms, 2 green onions
    • Cut the beef into small bite-sized strips too, as close to that matchstick size as well.
      4 oz beef
    • Mix all the Japchae Sauce ingredients together and set aside.
      2 TBSP gluten free tamari, 2 TBSP maple syrup, 2 TBSP sesame oil, 2 tsp garlic powder, 2 TBSP sake, 1 pinch black pepper, 1 TBSP roasted sesame seeds

    Stir Frying Steps

    • In a non-stick skillet on medium heat, add 1 tbsp of oil. Add in onions and carrots and cook until onions become translucent.
      1/4 cup sliced onion, 1 TBSP olive oil, 1 julienned carrot
    • Add in zucchini and cook, moving the ingredients until zucchini is glistening (aka. halfway cooked). Remove vegetables from pan and set aside.
      1/2 cup julienned zucchini
    • In the same pan, add the beef and mushrooms and 1/2 of the Japchae sauce. Cook and move the ingredients around until most of the liquid has evaporated.
      4 oz beef, 1/4 cup sliced mushrooms
    • Add the noodles and rest of the sauce. Stir and flip the contents around carefully and constantly to prevent the noodles from sticking to the bottom as it absorbs the sauce and the sauce evaporates.
      1 bundle Korean potato starch noodles
    • Once the sauce has mostly evaporated again, return the cooked vegetables to the pan. Add the green onion and toss to coat for ~1 min. Turn off the heat.
    • Serve hot or cold (I love these noodles cold).
    Keyword noodles, stir fry
  • Soybean Sprouts side dish (Kongnamul Muchim)

    Soybean Sprouts side dish (Kongnamul Muchim)

    Outside of kimchi, soybean sprouts are my FAVORITE of the side dishes. Salty, crunchy, and savory from the sesame oil in its seasoning sauce, I find these incredibly addictive when part of a banchan set.

    Soybean sprouts have a different texture to mung bean sprouts (which is more commonly found in stores). They are crunchier and hardier and have a yellow soybean attached to the white sprout that give an additional texture to each bite. You CAN cook this recipe with mung bean sprouts if you can’t find soybean sprouts, but the texture will be mushier and softer and you won’t get that yellow soybean bite at the end which, in my opinion, is the best part.

    An important thing to remember if buying soybean sprouts, soybean sprouts cannot be eaten raw. They are difficult to digest and you may end up with stomach pains. In addition, bean sprouts are known to carry more bacteria than other vegetables so it’s normally recommended to cook them first.

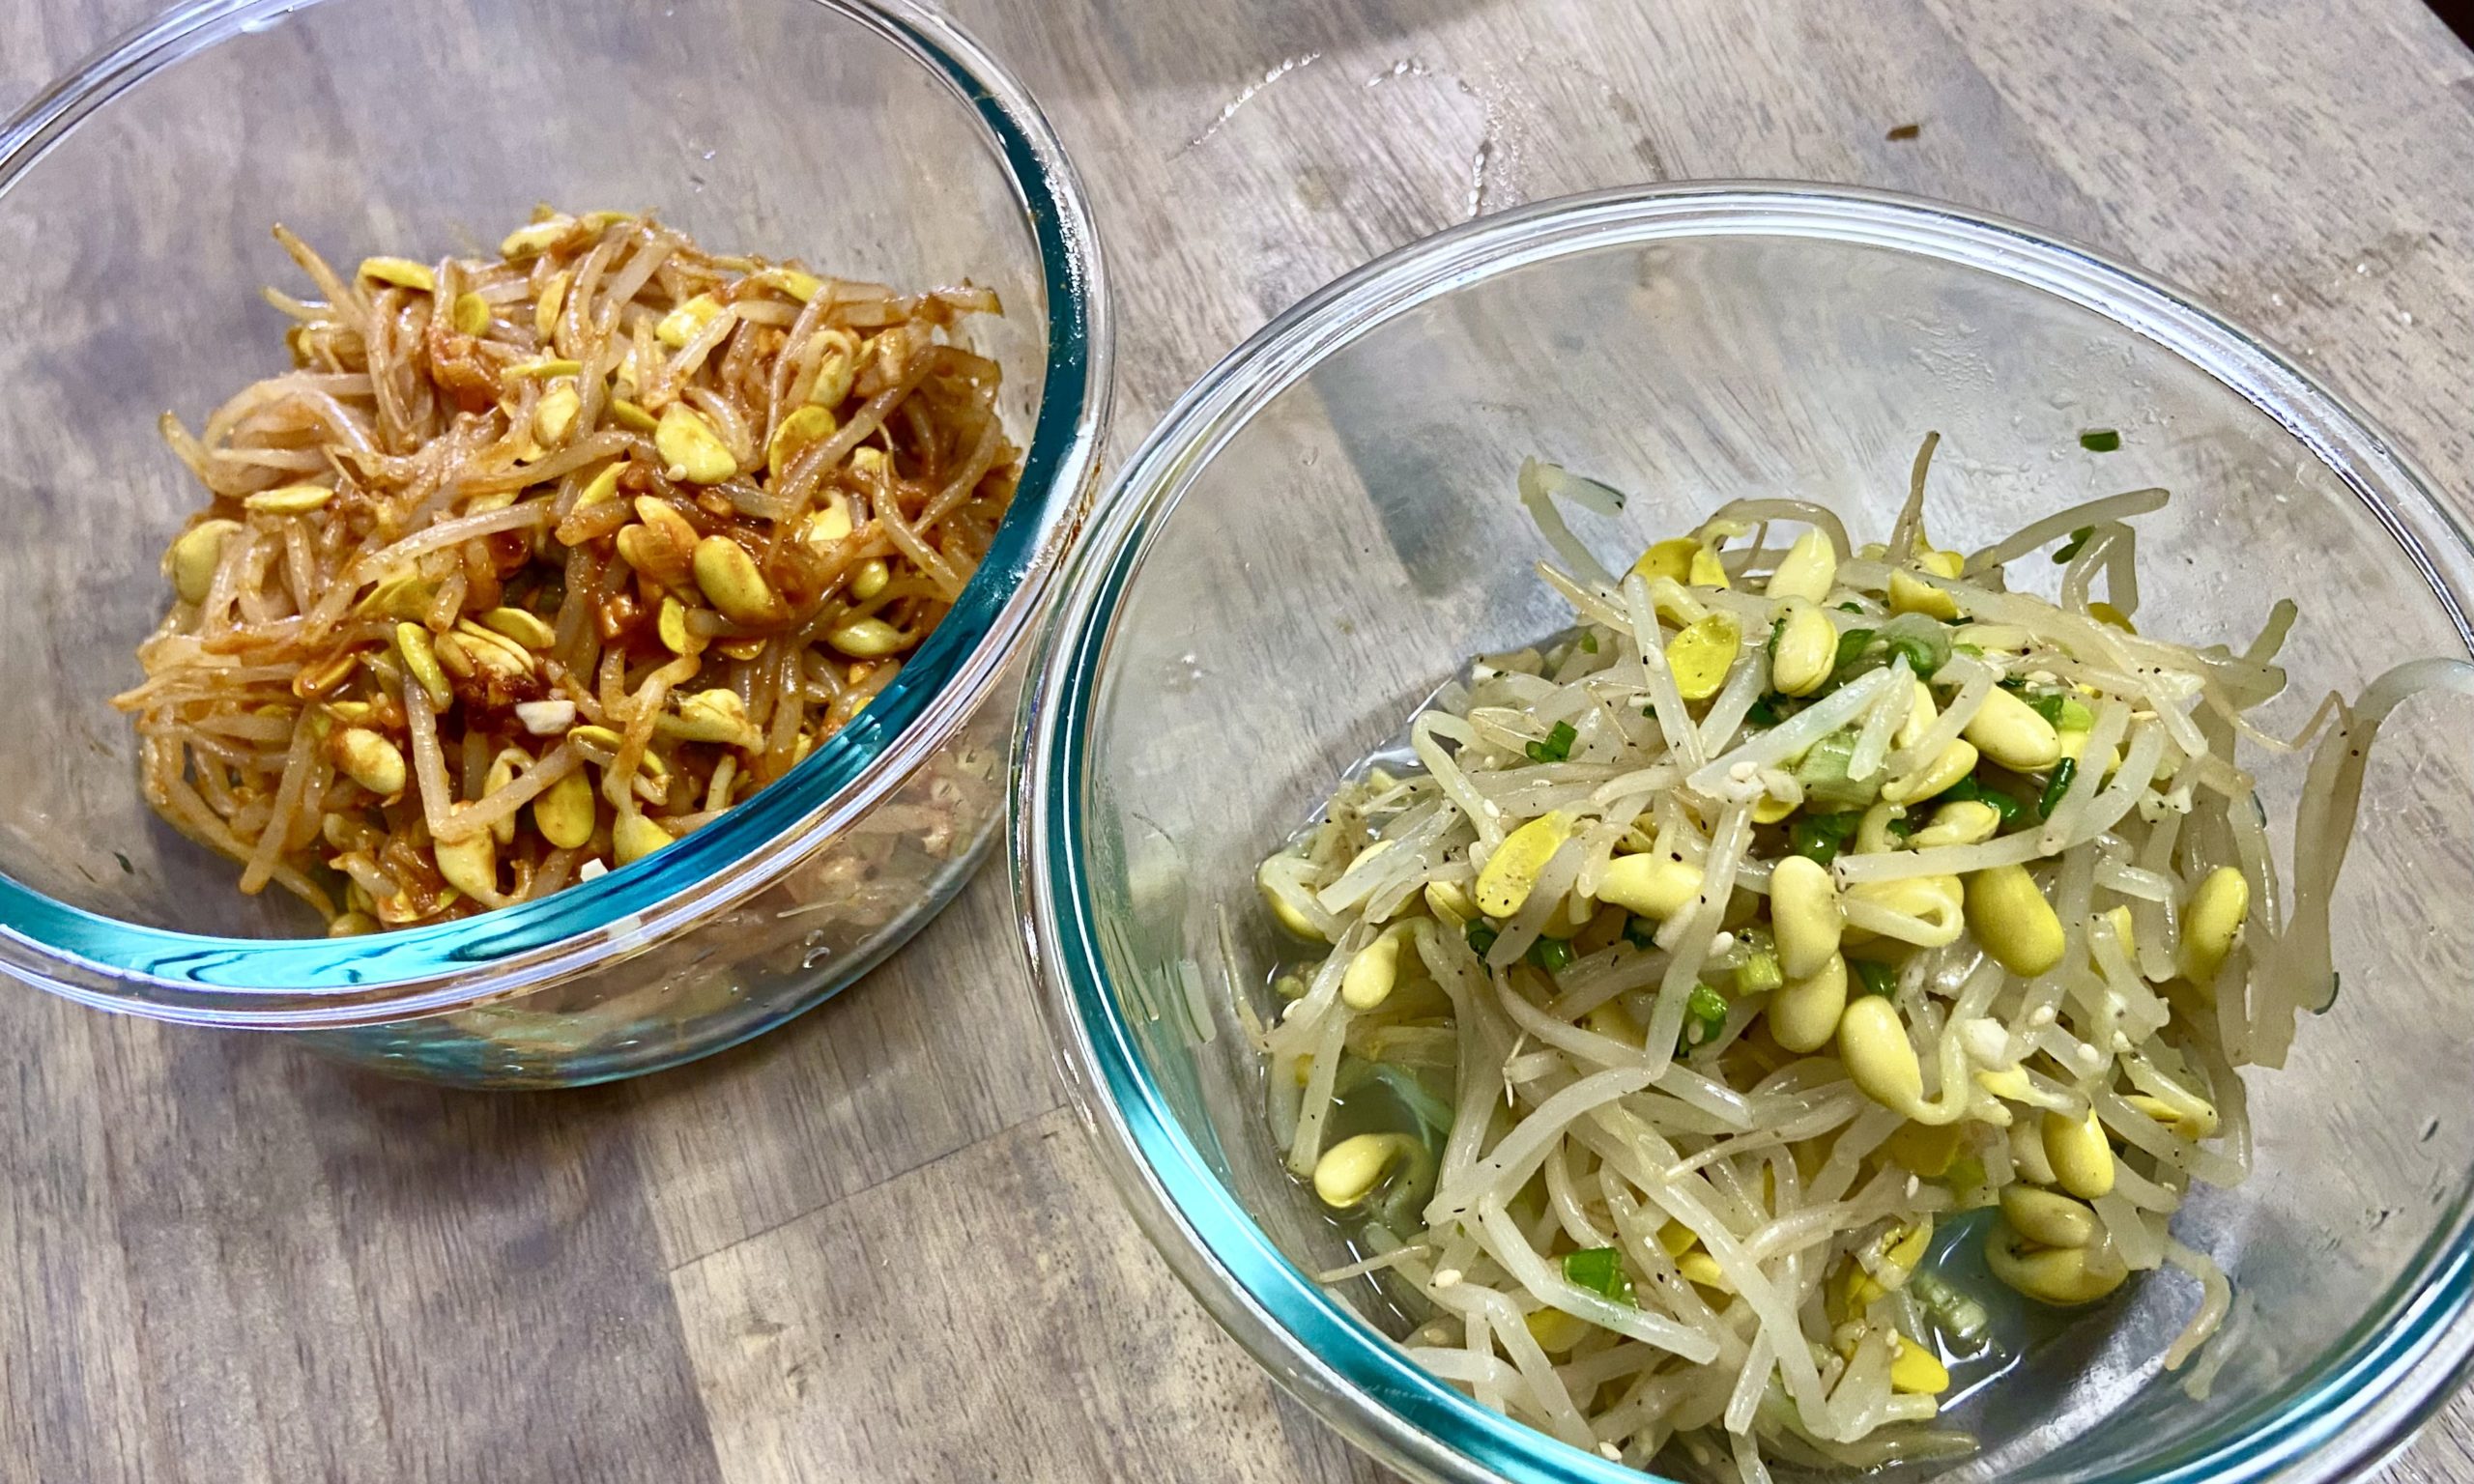
    For this recipe, you can actually make 2 versions at the same time: spicy garlic and plain garlic. I really loved the idea Seonkyoung Longest had of making both the plain and the spicy versions with the same batch of bean sprouts. This is especially useful if you’re only cooking for a small family, since soybean sprouts tend to be sold in 1 lb bags. And once you buy it, you generally want to cook it right away since they have a very short shelf life.

    If you don’t like spicy, just double up on the non-spicy ingredients and leave out the Korean chili powder and you’ll be good.

    This recipe is also 100% vegan and safe from my 4 food intolerances (no gluten, corn, coconut, and dairy). This is also a dish that is normally safe for me when eating out at restaurants too.

    This recipe is adapted from Seonkyoung Longest’s Kongnamul Muchim recipe. Do check out her website for additional Korean recipes and fusion recipes as well as some really helpful videos.

    spicy and non-spicy soybean sprouts

    Soybean Sprouts Side Dish (Kongnamul muchim)

    A spicy and non-spicy option, this crunchy and salty vegetarian side tastes amazing
    Prep Time 15 minutes
    Cook Time 5 minutes
    Course Side Dish
    Cuisine Korean

    Equipment

    • 1 large pot
    • 1 large strainer

    Ingredients
      

    • 1 1-lb bag of soybean sprouts mung bean sprouts are ok, but will not be as crunchy
    • 1 TBSP salt for boiling the soybean sprouts

    Base (Non-Spicy) Seasoning (per 1/2 lb soybean sprouts)

    • 1/4 tsp sea salt
    • 2 tsp sesame oil
    • 1 pinch black pepper
    • 1 tsp toasted sesame seeds
    • 1 minced garlic clove
    • 1 diced green onion

    Additional (Spicy) Seasoning (add to Non-Spicy ingredients for Spicy version)

    • 2 tsp gochugaru (korean red pepper flakes or powder) optional for spicy version

    Instructions
     

    • Rinse the soybean sprouts in a large bowl of water and remove any blackened or mushy sprouts or beans from the bowl. Strain the rest and set aside
    • Bring a large pot of water with 1 tbsp salt to boil (enough water that the soybeans would be fully covered). Once boiling, add the soybean sprouts and boil for 4 minutes on high with the lid on.
    • Turn off the heat and let the sprouts sit in the hot water for 1 more minute.
    • Strain the soybean sprouts and then rinse in the large bowl under cold water to stop the cooking process.
    • Divide the cold soybean sprouts into 2 dishes

    For the non-spicy soybean sprout side dish

    • Mix the salt, sesame oil, black pepper, garlic, green onion, and toasted sesame seeds in a bowl, then add 1/2 the soybean sprouts in. Using chopsticks or your hand, toss the soybean sprouts to coat them thoroughly. This is now ready to serve.

    For the spicy soybean sprout side diesh

    • Mix the salt, sesame oil, black pepper, garlic, green oinon, and toasted sesame seeds, AND gochugaru in a bowl, then add the other 1/2 of the soybean sprouts in. Using chopsticks or your hand, toss the soybean sprouts to coat them thoroughly. This is also now ready to serve.
    Keyword banchan, bean sprouts, namul
  • Garlic Eggplant Side Dish (Gaji-namul)

    Garlic Eggplant Side Dish (Gaji-namul)

    This is an incredibly easy-to-make Korean side dish that takes minimal effort. I actually learned how to make this dish through another food blogger, Maangchi, who is an AMAZING source of Korean dishes and cooking techniques. Many of her recipes convert easily to a gluten-free lifestyle.

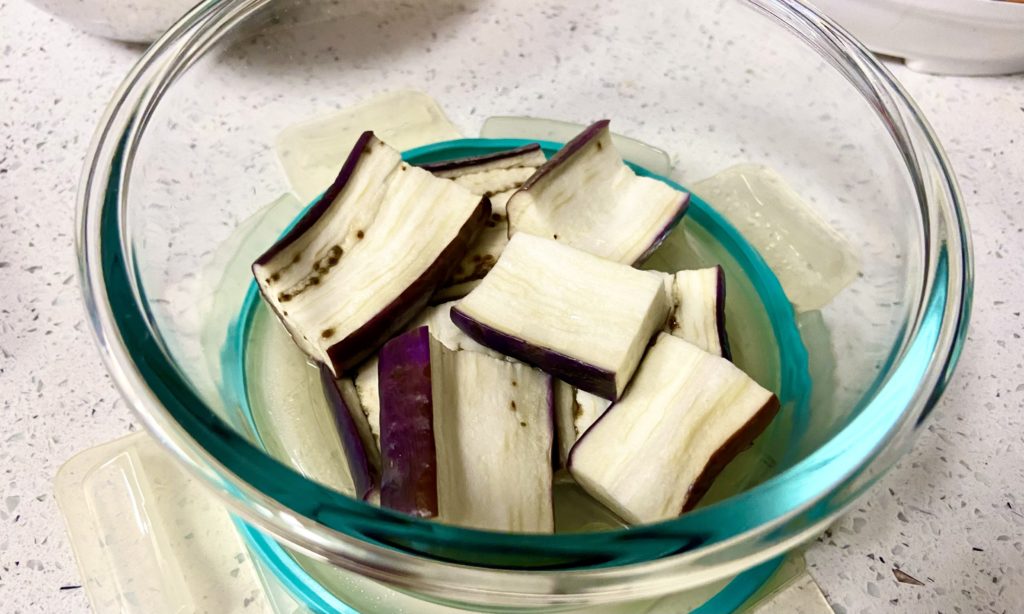
    This recipe is already a fairly easy one to make, but rather than take out a stove-top steamer, boil water, and watch the time and water levels to make sure it steams well, a way to make cooking this dish even easier is to steam the eggplant through the microwave.

    Microwave-steaming is kind of a cheat way to cook, but it works just as well as stovetop steaming and arguably retains more nutrients than the traditional method. With the eggplant steaming in a microwave, all you have to do with this dish is mix together the seasoning sauce and wait for the microwave timer to complete. Then mix the two part together for a delicious vegetable dish.

    steamed eggplant
    Steaming eggplant in the microwave is a quick and low effort method that also retains nutrients well
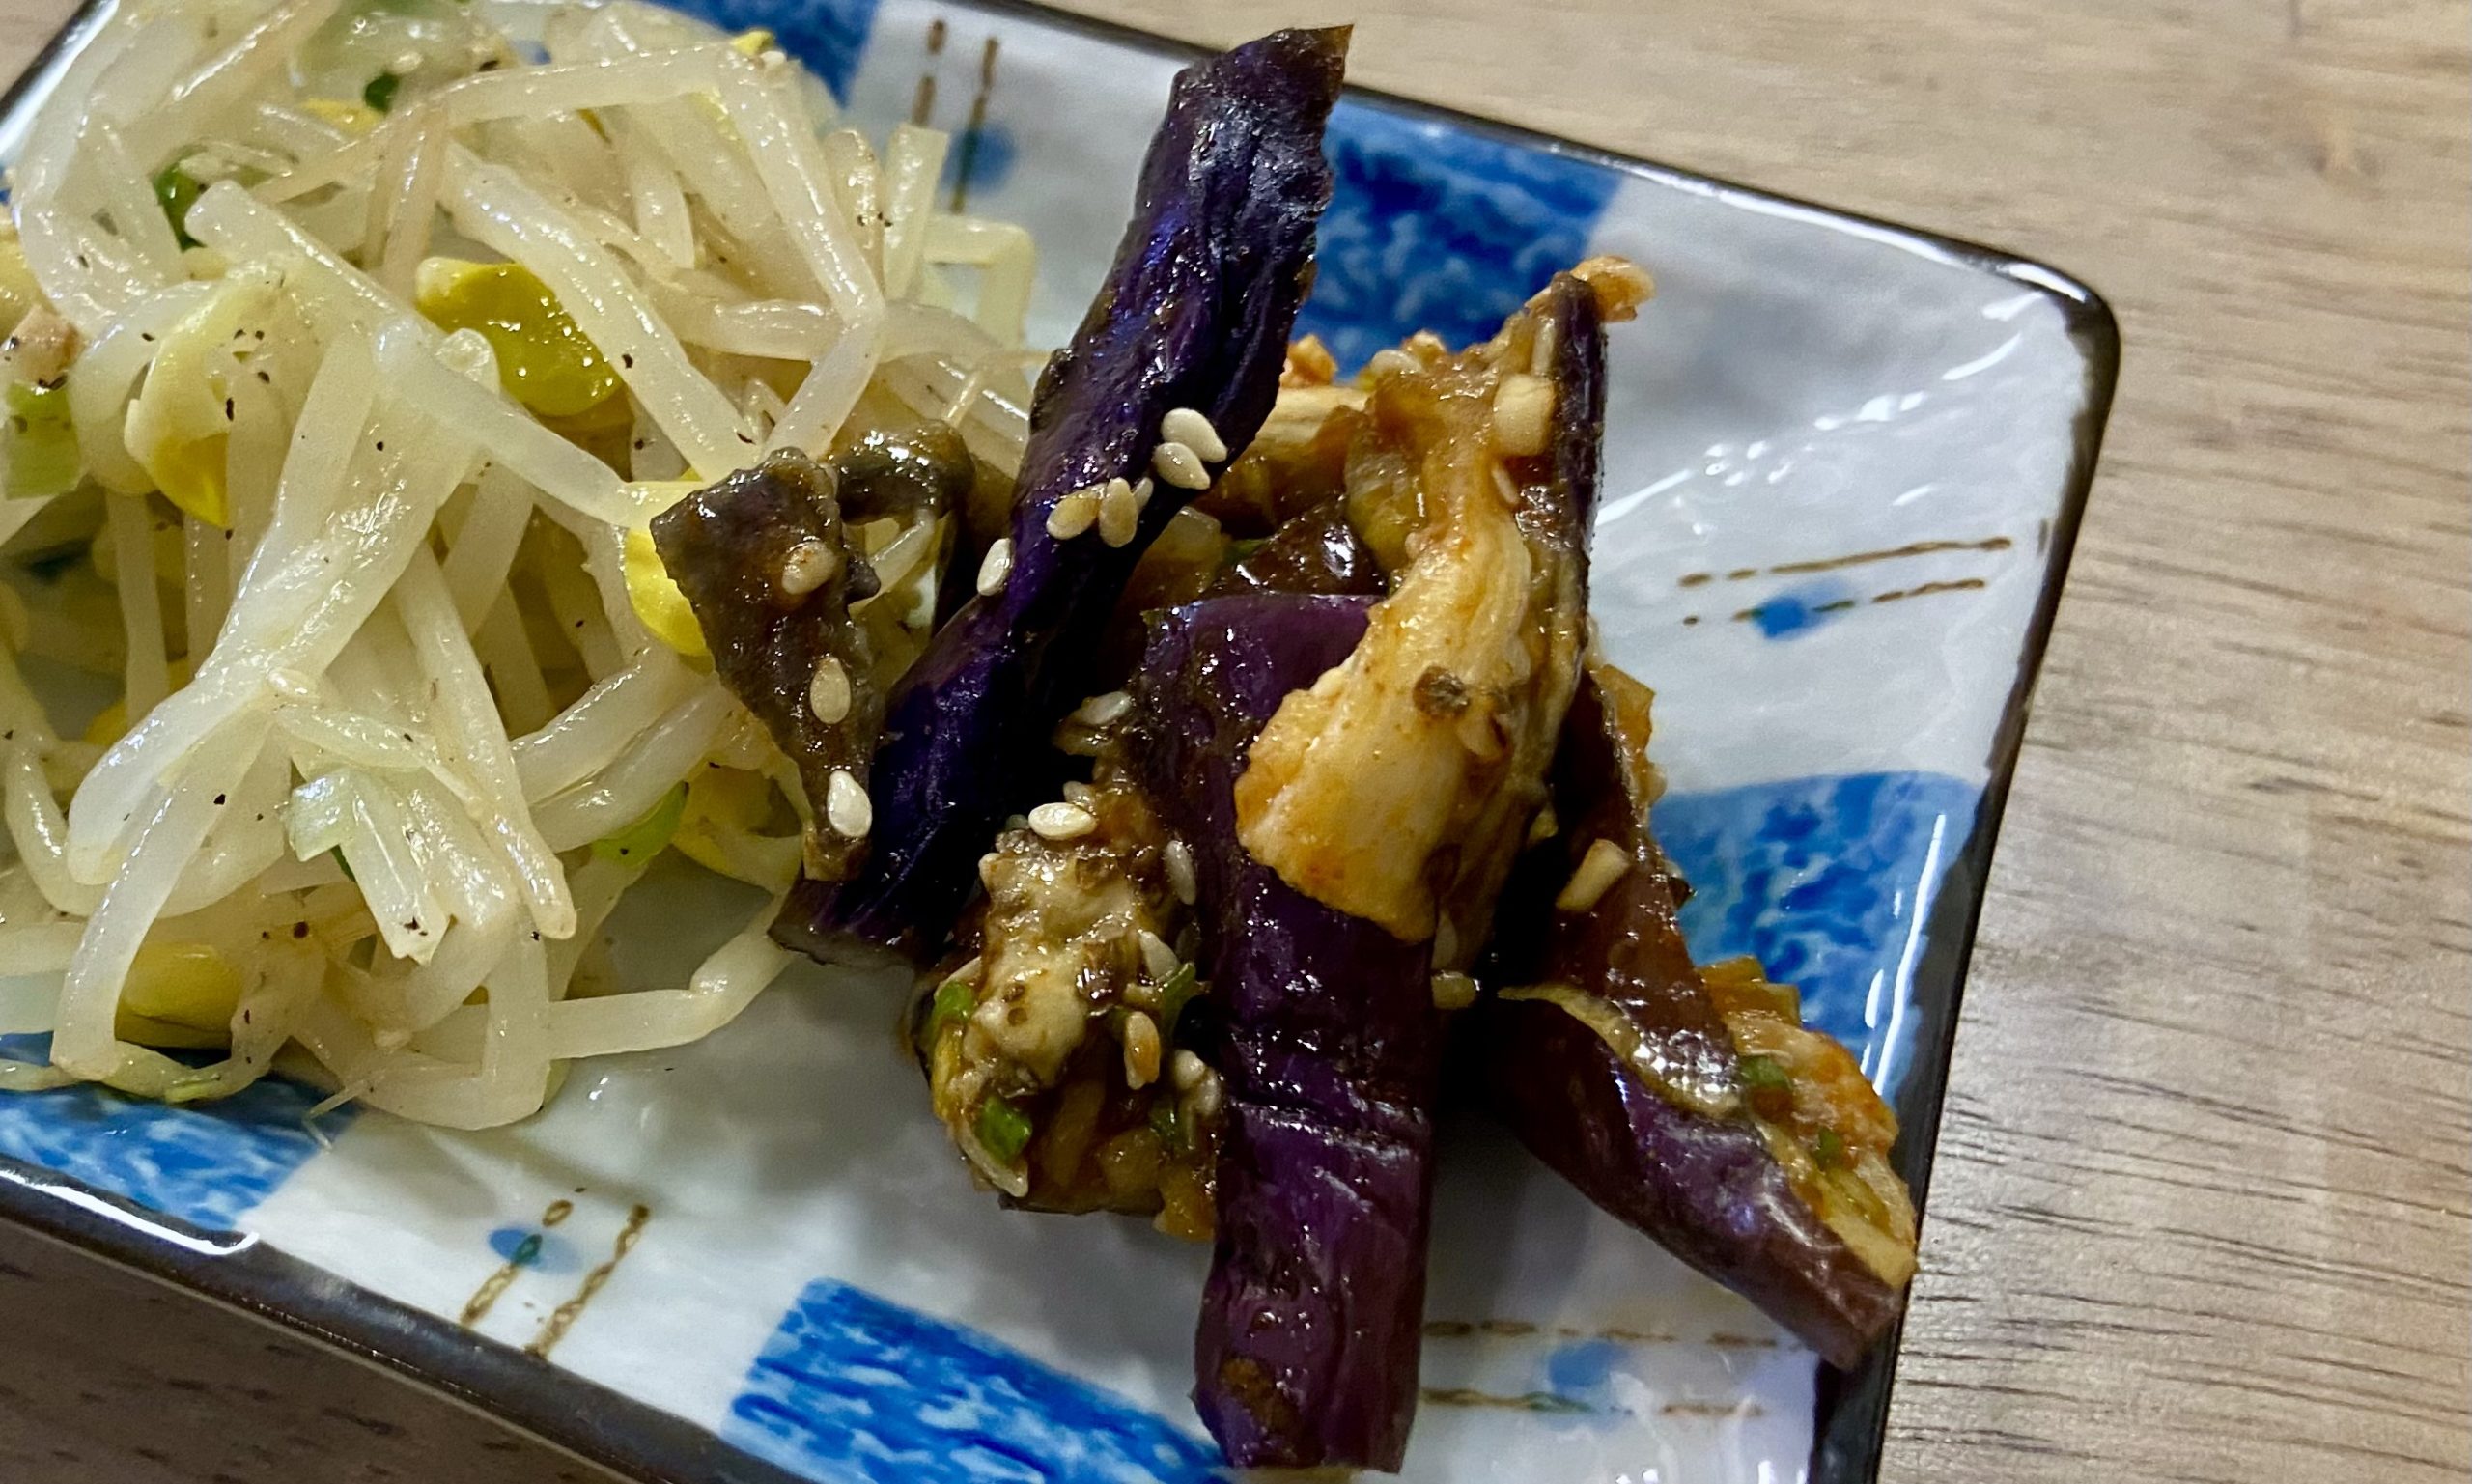
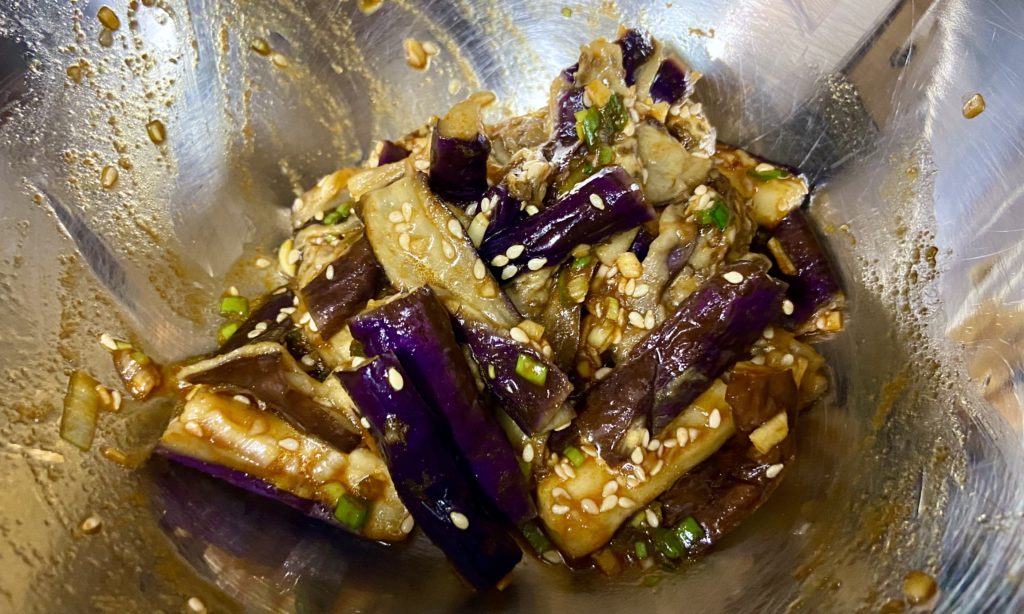
    Eggplant pieces in garlic sauce
    Torn up pieces of eggplant pick up the sauce better than knife-cut.

    To adapt this recipe to a gluten free diet, the only ingredients to watch out for is the soy sauce and fish sauce. For fish sauce, make sure to buy one with safe ingredients (I always get this Lucky Star brand because its ingredient list is simple (it also doesn’t contain shrimp, whereas others do, and my partner cannot have shrimp), or just omit and replace with a pinch of salt instead. Otherwise, use a gluten free tamari for the soy sauce and you should be good.

    eggplant side dish

    Garlic Eggplant Side Dish

    An easy-to make vegetarian side-dish with strong garlic flavors
    Prep Time 10 minutes
    Cook Time 1 minute
    Course Side Dish
    Cuisine Korean
    Servings 4

    Ingredients
      

    • 1-2 long purple eggplant Chinese or Japanese varietals are best because of their quick-cooking and sweetness, but other eggplants work too
    • 3 minced garlic cloves
    • 2 diced green onions
    • 1 TBSP gluten free tamari soy sauce
    • 1 tsp fish sauce omit if vegetarian and add 1/4 tsp salt instead
    • 1 tsp gochugaru (Korean hot pepper flakes or powder)
    • 2 tsp sesame oil
    • 1 TBSP toasted white sesame seeds crushed

    Instructions
     

    • Cut the eggplant into 2-in length, then cut each piece in half.
    • Place the pieces in a microwave safe container with 1-2 TBSP of water. Place container with the lid slightly ajar into the microwave on high for 5 minutes.
    • While the eggplant is steaming in the microwave, in a separate bowl, mix your seasoning ingredients together.
    • When the eggplant is dont, remove from the microwave and let it sit on the counter for 5-10 minutes until it's cool enough to handle.
    • With your hands, tear the eggplant lengthwise into bite-sized strips and add the strips of eggplant to the bowl with the seasoning sauce.
    • Mix together and serve. Alternatively you can store this side dish in the fridge for 3-5 days.

    Notes

    This recipe was adapted from Maangchi’s Gaji-namul recipe on her website. She offers a more traditional way to make this via the stovetop steaming method. Definitely check out her website since she has a lot of Korean recipe videos you can watch as well! 
    Keyword banchan, eggplant, namul
  • February 2022: Korean Month

    February 2022: Korean Month

    2nd month of the 12 months of cuisine challenge is… Korean!

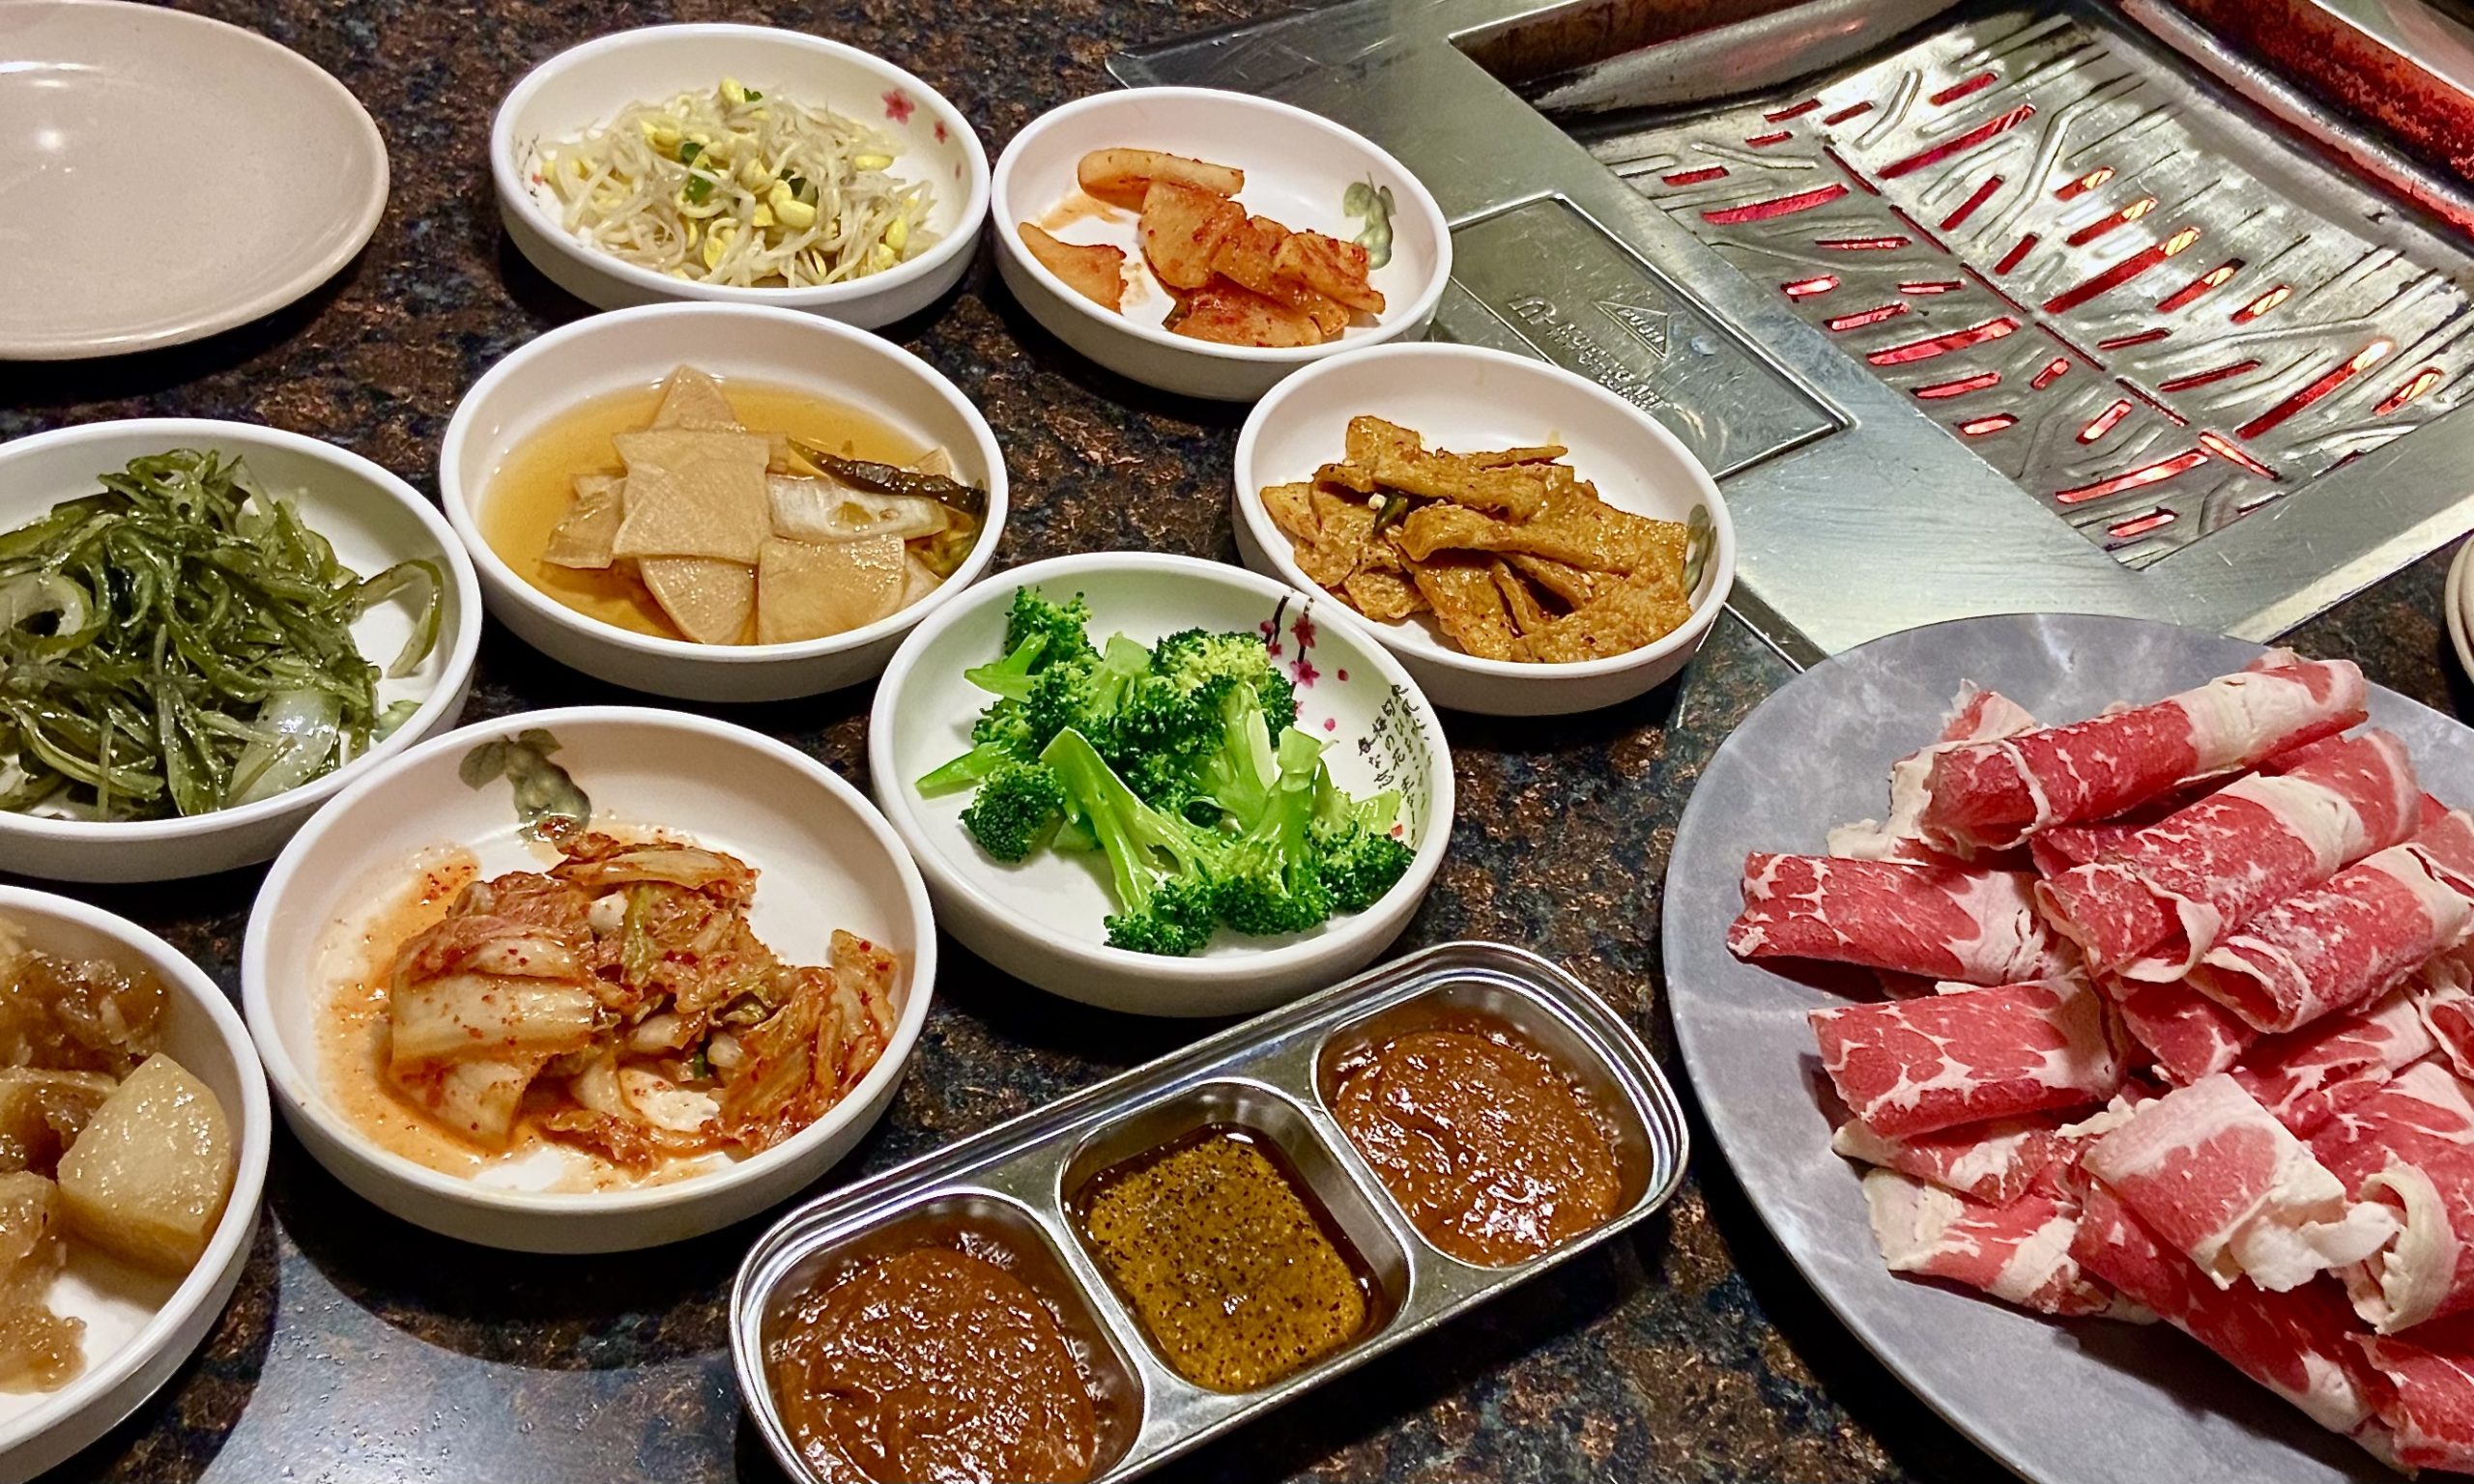
    Korean is one of my FAVORITE cuisines to eat. Outside of the Korean BBQ experience where you grill sliced meat directly at your own table, the stews and side dishes (banchan) are incredibly delicious!

    Eating Out at Korean Restaurants

    Korean food is also one of those that is easier for me to eat out for. Like Japanese cuisine, it is, by default, dairy free and coconut free (*doesn’t mean it doesn’t exist in their cuisine, just that many of their dishes won’t have these ingredients). And with the exception of soy sauce (which I personally can tolerate), it is mostly gluten free too.

    The main point of concern with Korean food is corn. Korean dishes often use syrups to sweeten and thicken dishes instead of sugar. There are a variety commonly used: honey being the most natural (but also most expensive), corn syrup, and another kind known as “oligo syrup” (oligosaccaride).

    Oligo syrup is a neutral tasting sweetening syrup made most commonly out of glutinous rice. Additionally, it’s supposed to have beneficial probiotics and is low calorie, so it’s often considered a healthier sweetener than the alternatives (personally though, I wonder how beneficial the bacteria will be though since sugars are kind of the counter-agent of probiotics when entering your digestive system). However there are MANY varieties of oligo syrup. Some are made with fruit, some are pure grains. Others have artificial sweetener included. The difficulty is that you never really know what’s in oligo syrup and yes, corn is one of the “grains” that is can used.

    In the US, you’re more likely to find Korean restaurants that use corn syrup than other sweeteners. Corn syrup is cheap and has a neutral flavor and is readily available in store shelves and by the restaurants’ suppliers. If the restaurant uses oligo syrup, then it’s a gamble on whether it has corn in it or not (chances are that it won’t because most oligo syrup is made of rice, but you have to determine if it’s worth risking or not. Always ask if you can!).

    Additionally, corn oil is a common cooking oil for Koreans too. Most of the US restaurants don’t use corn oil since it is not as widely available as canola or other vegetable oil, but it’s worth pointing out if you’re in a region where that is unknown.

    So corn is the main issue. Koreans, like the United States, is not against using corn in their dishes. If the food is cheaper (aka. more instant-made than cooked from scratch), it’s likely to have corn in it (i.e. maltodextrin or corn starch in instant soup flavor packets vs homemade broth, corn syrup in a premade marinade vs homemade with honey).

    There are staple dishes in a Korean cuisine that don’t use sweeteners. Stews such as galbitang (beef rib stew), samgyetang (ginseng chicken soup) and rice dishes such as bibimbap (though be careful if you get it with added meat. Bulgogi, a common additive, is a sweetened beef dish) do not have any sweetener added. Then there is the quintessential tofu stew (no sweetener, but I did get sick once eating it at a restaurant, which likely means the broth was not homemade but reconstituted from a powder).

    Benefits of Korean Month

    Korean food has a lot of vegetables

    Most of us know Korean food from the Korean BBQ and therefore think of it as a meat-heavy cuisine, but korean food is actually pretty high in vegetables, Kimchi being their biggest staple.

    2. Korean food has a lot of probiotics

    The iconic staple of Korean food is kimchi, which is a fermented spicy cabbage full of probiotics. Many of the vegetables that are part of Korean cuisine are fermented or pickled and offer a great source of beneficial bacteria. Kimchi has been widely accepted and has crossed culinary borders and is used in a lot of “fusion”-style dishes, so you can’t go wrong adding this to your dietary staples.

    3. There’s a lot of resources to pull from

    Thanks to recipe bloggers like Maangchi and Seolleongest, there’s a plethora of Korean recipe blogs to turn to for how to make those iconic dishes.

    Also… Having Korean friends who can impart their family knowledge to me and let me know if I’m messing up any recipes can’t hurt. 😀

    Korean Month Challenges

    1. Like Japanese Cuisine, Korean Cuisine is High Carb

    Sweet potatoes, noodles, and rice are staples in Korean food. However, most of the time these are on the side, so I think, like Japanese food, it will be more about portion control than trying to find alternatives.

    2. Many Korean dishes use sweeteners to marinate or flavor their ingredients

    Like Japanese cuisine, a lot of dishes ask for added sugar (IMO…. sugar + soy sauce is one of those quintessential flavor combinations that need to exist in every kitchen’s pantry) and we’ve been wanting to reduce our sugar and carbohydrate intake this year. I’ve also been learning more about the different types of sweeteners lately and want to try to reduce our fructose intake (in addition to our overall sugar intake), so I might be making some swaps for maple syrup in some of these dishes to see if the taste isn’t negatively affected.

    3. Some ingredients need to be specially sourced

    I have several of the ingredients already due to Japanese month (and just having a large spice and sauce collection over the years of cooking mostly Asian foods). There are some others though that may require a special trip to a Korean store (or general Asian foods store, though I have seen some ingredients like gochujang in Whole Foods recently).

    4. Meat has gotten expensive lately

    I don’t know about where you are, but beef and pork have jumped in price in the recent months, which is not so easy for someone with dietary restrictions (who is also trying to reduce dependence on carbs). We’ll see what we can do, and maybe we can dedicate a few meals to more vegetarian-like dishes.

    Starter Ingredients:

    Korean cuisine shares many of the same ingreidnets as Japanese cuisine (and other Asian cuisines as well), so if you did Japanese month first, you may have some of these in your pantry already now.

    • Gluten free” tamari soy sauce – nearly identical to default soy sauce, it has a slightly less full-bodied taste. It will still work well for cooking purposes. Make sure you get tamari that is specified as “gluten free” (“tamari”, while identified in western culture as the gluten free version of soy sauce, is actually a different item in Japanese cuisine and depending on the brand can still have some wheat in it).
    • Sake – Koreans have soju, but I like using sake as my universal cooking alcohol. It’s easier to just keep 1 kind than own bottles of multiple types. Both are rice-based. Soju is stronger.
    • Sesame oil – a toasty and nutty oil that should be used more as a finisher than a cooking oil. It is a prominent flavor in a lot of Korean cuisine.
    • Gochugaru (chili flakes) – a dried and ground up chili powder made of Korean chilis. It’s worth it to get this instead of other types of chili. There are hot versions and mild versions (mild omits the seeds) and 2 levels of grind (coarse grind and fine powder). I usually just get a bag of the fine powder in mild heat and use that for multiple dishes.
    • Gochujang (chili paste) – a fermented paste made from the same Korean chili. It’s savory, slightly sweet, and spicy depending on the heat level you buy. Be careful when picking out a gochujang brand and look for ones without corn syrup or wheat. Not all gochujangs are made the same.
    • Doenjang (fermented bean paste) – fermented soybean paste that is like a thicker, more pungent miso. A little goes a long way. It’s commonly used in soups and also commonly paired with gochujang for stews and marinates. Be careful when picking out a doenjang brand and look for ones without wheat. Doenjang SHOULD just be soybeans and salt.
    • Rice vinegar – milder than white vinegar, you’ll primarily use it in pickling non-fermented vegetables for quick-cook side dishes.
    • Napa Kimchi – fermented napa cabbage. Typically found in clear plastic jars in the refrigerated section, these have varying levels of spiciness and can be sold whole or chopped up. If you’re vegetarian or vegan, be careful when picking out a brand since kimchi is often fermented with fish or krill-like shrimp. Also be wary of corn syrup. Most kimchi, if it uses a sweeter, will use cane sugar… but there’s always a chance someone decided corn syrup is better (A note: there are MSG-free-labeled versions out there, but it’s important to point out that MSG is a naturally occurring product of the fermentation process. It is possible the MSG-free labeling means there’s no ADDED MSG)
    • Ginger, Garlic, and scallions
  • Japanese Curry

    Japanese Curry

    The last recipe I want to share for Japanese Cuisine month is Japanese curry.

    Japanese curry is one of those easy-to-make recipes that also has a deeply passionate following. Every home has at least 1 box of the pre-made curry blocks and there are plenty of variations and brands available to choose from. Just boil some water, add your stew basics (potatoes, onions, carrots), and melt some of the cubes to have a ready meal for a family.

    vermont curry box
    Curry blocks like these are easy to find and there are many brands and varieties to choose from. However, these are not friendly to a gluten free, corn free, or dairy free diet.
    S&B Curry Powder can
    In order for someone with dietary restrictions to gluten, dairy, and corn to enjoy Japanese curry, you need to make it with Japanese curry powder

    The reason curry is “easy to make” at home is because of those curry blocks, cubes of pre-made flavored roux that are shelf-stable. It’s very uncommon to find anyone who makes Japanese curry from scratch. You’re more likely to find rows of the curry block boxes in the grocery store than a single container of Japanese curry powder.

    This is one of those foods that makes me jealous of those without my dietary restrictions. Even when cooking from scratch, Japanese curry is a roux-based curry, meaning it starts with a base of slowly browning a mixture of flour and butter to make what is called a light roux.

    This method of making Japanese curry took a lot of research and exposure to many cuisine types to come up with and has a lot of thanks to give to Indian cuisine specifically.

    The magic ingredient that makes eating Japanese curry possible is… cashews.

    Indian cuisine has cashew based curries (which also tend to have dairy in it to… another story for another day) where cashews are soaked and blended into a pureé where when boiled, thickens the broth into a creamy stew.

    We use the same method in this Japanese curry recipe.

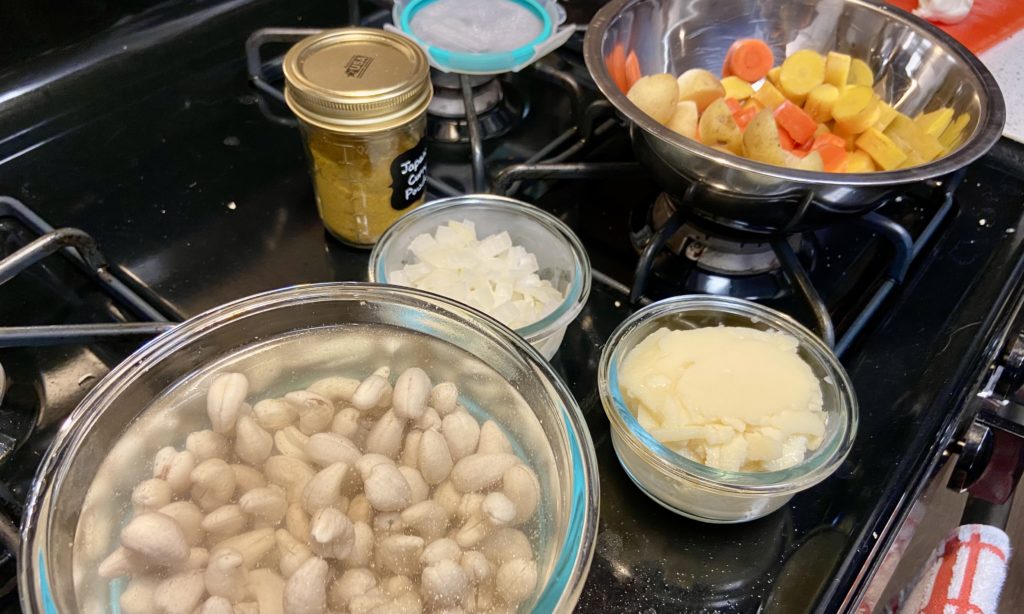
    Ingredients for curry
    Cashews have been soaked overnight and are ready to be blended for today’s curry recipe.
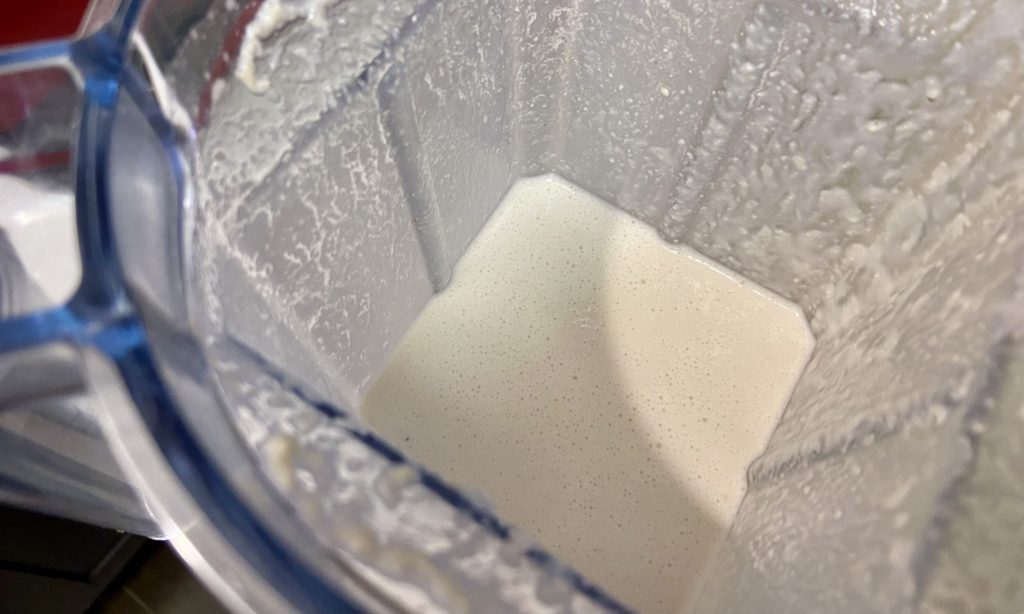
    pureéd cashew cream in a blender
    Blend the soaked cashews in a high-powdered blender to produce a thick creamy liquid that we’ll use to substitute the dairy in this curry
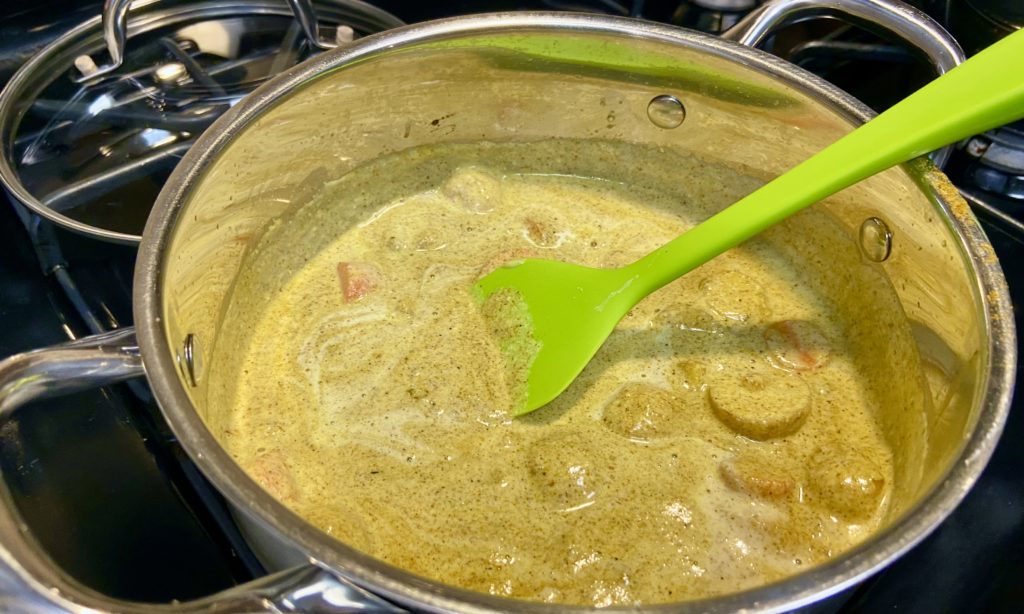
    lighter yellow colored pot of curry
    Everything in the pot! Don’t worry if the color is too light at this point in time. As the curry cooks, the contents will meld into a darker more even color.
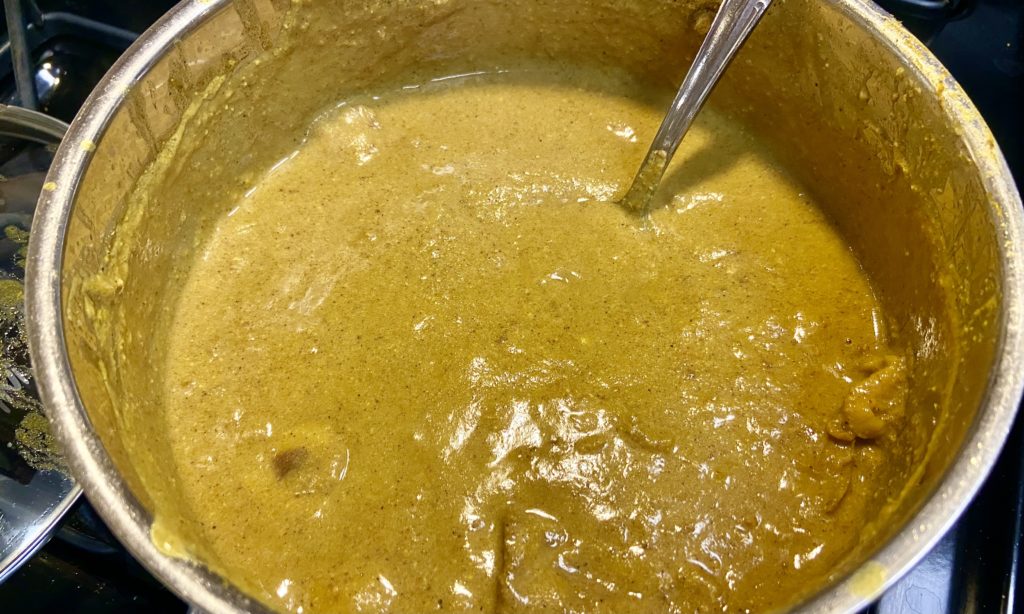
    Curry that is a light brown after cooking
    After 20-30 minutes of simmering and occasional stirring, the curry will turn tan and the flavors will have melded.
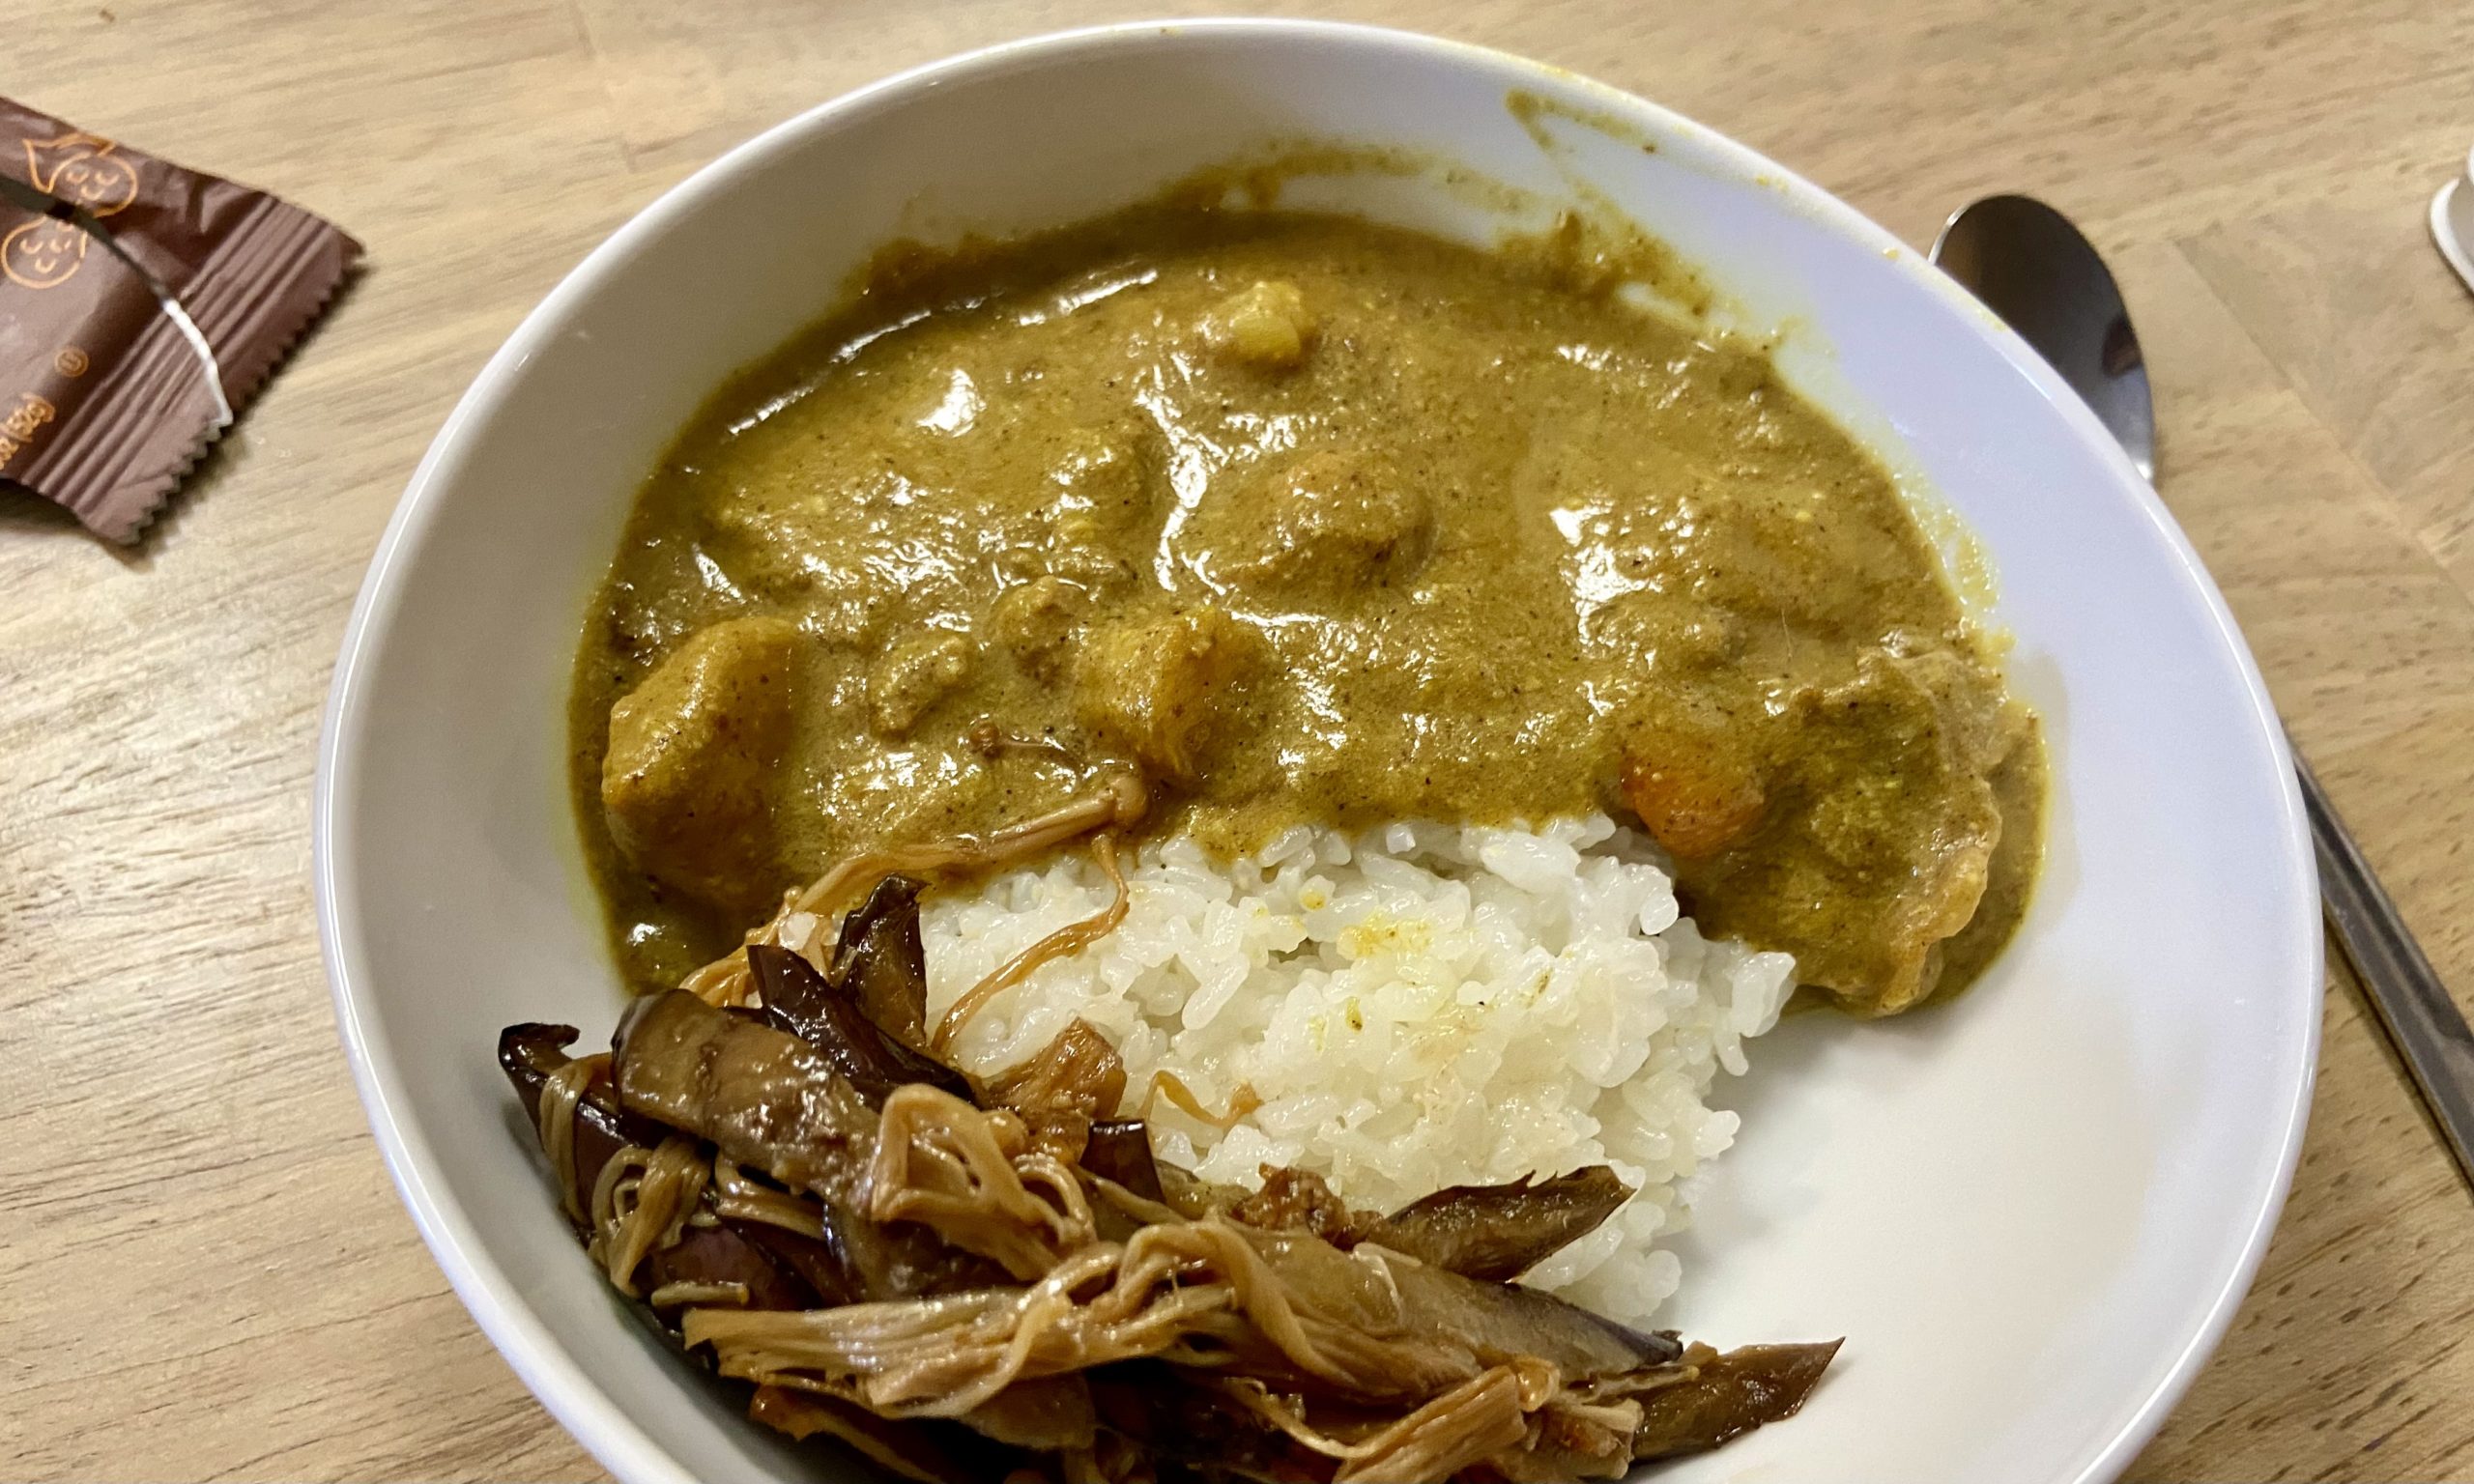
    Bowl of curry and rice and a side

    Cashew-based Japanese Curry (Gluten Free, Dairy Free, Corn Free, Coconut Free)

    A curry free from gluten, dairy, corn, coconut, and soy that uses cashews to create that thick stew we all love
    Prep Time 4 hours
    Cook Time 30 minutes
    Course Main Course
    Cuisine Japanese
    Servings 6

    Equipment

    • 1 Vitamix blender or other high-powered blender
    • 1 large pot

    Ingredients
      

    Cashew Cream

    • 1/2-3/4 cup raw cashews raw is best, but roasted and unsalted work ok
    • 2 cups water

    Curry

    • 1/4 cup chicken fat other animal fat also works. Olive oil or other vegetable oil also acceptable but may not create as rich of a curry. See notes.
    • 1/4 cup diced onions
    • 2 chopped carrots
    • 1 chopped potato
    • 1/2 lb sliced beef
    • 1/4 cups curry powder S&B curry powder is iconic, but you can also make your own Japanese curry powder. See notes.
    • 2 cups beef broth chicken broth or dashi stock also ok

    Instructions
     

    Prep Ahead

    • Soak the cashews in water for at least 4 hours or preferably overnight. But do not soak more than 12 hours (I find the ground cashew grains stay separated if they are oversoaked).
      1/2-3/4 cup raw cashews, 2 cups water

    Make Cashew Cream

    • Right before starting to make the curry, blend the cashews and water in a Vitamix or other high-power blender until the cashews turn into a creamy liquid consistency. Set aside

    Make the Curry

    • In a 3-qt or larger pot, add the chicken fat and onions. Sauté until onions are translucent
      1/4 cup chicken fat, 1/4 cup diced onions
    • Add the potatoes and carrots. Add the sliced beef. Add the curry powder and stir to cook, but be careful not to burn the powder.
      2 chopped carrots, 1 chopped potato, 1/2 lb sliced beef, 1/4 cups curry powder
    • Add the cashew cream, and then add the beef broth. Add more water as needed. Increase heat to boil.
      2 cups beef broth
    • Once boiling, reduce pot to simmer and stir frequently, making sure to scrape the bottom of the pan with the spatula to prevent the cashew cream from burning. Simmer for 20-30 minutes.
    • Serve when ready. The flavors will meld over time, so this curry is also great if reheated next day. Enjoy

    Notes

    The creamy richness of butter is what gets lost in this recipe compared to using curry roux cubes. In order to add this back, I highly recommend using animal fat.
    For the earthy flavors of a roux, I recommend adding some “umami” with either MSG, salt-cured egg yolks, or powdered shiitake mushrooms. I especially enjoy eating a bowl of Japanese curry with a mixed-in umeboshi. 
    S&B Oriental Curry Powder is the only off-the-shelf Japanese curry powder I see in Asian grocery stores. Japanese curry is a pretty iconic flavor so you can’t go wrong with it. However, if you’d like better control with the flavor profile, you can also mix your own batch of curry powder. I have a go-to recipe I use. Recipe TBD. 
    Keyword cashew cream, curry
  • Japanese Cuisine Month-End Review

    Japanese Cuisine Month-End Review

    We’ve reached the end of January and therefore the end of the 1st month of my 12-month cuisine challenge. Since this was the 1st time trying this kind of challenge, it was also a bit of a trial run of creating and curbing expectations on what would happen during a month. So this review is split in 2 sections: thoughts on the challenge itself, and thoughts on Japanese cuisine from my exposure this last month.

    Some thoughts on this monthly cuisine challenge:

    1. 1 month feels like a lot, but unless you’re cooking every single meal in those 30/31 days (and since my intent was to learn quick-and-healthy or preppable meals, this definitely didn’t happen), the time actually goes by pretty quickly. The days we don’t eat at home and choose to go out are fewer days in which to explore the cuisine in the kitchen. There will also be days where I try something and it doesn’t work out. They aren’t always worth my time to write an entry for. So in the end, 1 month focusing on a cuisine is only enough time to scratch the surface of that cuisine.
    2. It’s unrealistic in my current lifestyle to expect to eat 1 cuisine type all month long. In addition to days where cooking was not an option, I think both my partner and I just got sick of Japanese home cooking every day and actively sought out outside foods. There were trips for burgers, pupusas, and salads (but we did go out for sushi as well).
    3. Having multiple references for a cuisine type is important. It’s also important to not rely on only Google Search to find those references, since the same recipe blogs kept popping up for me (and while excellent resources, seemed to offer only the same type of recipes that started to sound and taste the same after awhile). For Japanese month, I had to start digging back to 10+ years ago when recipe Youtubers started being a thing (Cooking with Dog being the most prominent one back then). Only then did I start seeing uniquely-flavored foods that didn’t all rely on the soy sauce and sugar combination.
    4. At the end of the month, I had a lot of leftovers to use up, so there wasn’t a whole lot of “new cooking” to share anymore. I think it’s safe to assume that the end of every month will be the same as I “clean up” the fridge for the next month’s challenge.

    Some thoughts on Japanese cuisine:

    1. A lot of the uniqueness of Japanese cuisine comes down to their native ingredients, which aren’t all readily available in other countries (our popular chain markets have Asian ingredients, but good luck finding burdock root or lotus root or shinjuku leaves outside of a specialty store. We do have Japanese grocers, but it’s not easy to get to them every week and they aren’t cheap). The actual cooking methods are pretty similar from dish to dish, especially for “nimonos” which follow the same basic recipe at different ratios and cooking times. The ingredients themselves impart unique flavors that make Japanese food simple and accentuating of “fresh and seasonal”.
    2. Many Japanese dishes are adapted from other regions, or simply have similar qualities due to the historical origins of those cultural cuisines. Stir fries, fried rice, hot pots, and curries all have their variations in the neighboring Asian countries.
    3. Modern Japanese cuisine adapts a lot from western foods (omurice, sando, japaghetti, croquettes, etc), which I didn’t touch at all. I also didn’t fry anything, which I’m not sure I will try at all with the upcoming months. I’m just not good at frying.
    4. About halfway through the Japanese month challenge, I started to feel like all Japanese home recipes are the same: take ingredient, add in a variation of tare (soy sauce and sugar) and cook. No, I did not “crack the code” of Japanese cuisine (if there even is one to crack, it wouldn’t be as simple as that). The cause may be the availability of certain ingredients in my region. It may be the type of recipes surfaced to me on Google search. It’s also possible that my methods of cooking restrict other flavor profiles (for instance, I did not fry anything). And it’s also possible my subconscious avoidance of foods that don’t meet my restrictive diet (no gluten, dairy, corn, or coconut) ended up pushing me towards nimonos, fried rice, and etc. If anything, this presents a future challenge of trying to diversify and try other Japanese dishes. Maybe I’ll revisit Japanese month in the future?

    After a month of Japanese cooking, I feel I only scratched the surface of what Japanese cuisine is and what kind of recipes can be easy for a home cook to adapt to a gluten-free, corn-free, dairy-free, and coconut-free diet.

    General Cooking Lessons Learned

    1. Prepping a large batch of meat ahead of time gives you a lot of quick-cooking meal opportunities for the week.
    2. Likewise, prepping a large batch of side vegetables means you’ll have leftovers that can be used in future meals, lowering the work load of those upcoming days.
    3. Pure carb meals appear to be the default go-to’s for quick meals, but aren’t exactly the healthiest. Big ass salads are a win with the right (homemade) dressing and are also easy to pull together, especially when the salad part can be bought premixed in bags or boxes from your nearby chain grocer.
    4. Nabes (clear-broth stews) are quick to make and just require boiling a pot of stuff all together.
    5. Recipes don’t need to have a complex number of ingredients. Sometimes just 2-3 things combined together is enough of a flavor profile to make a dish appetizing.

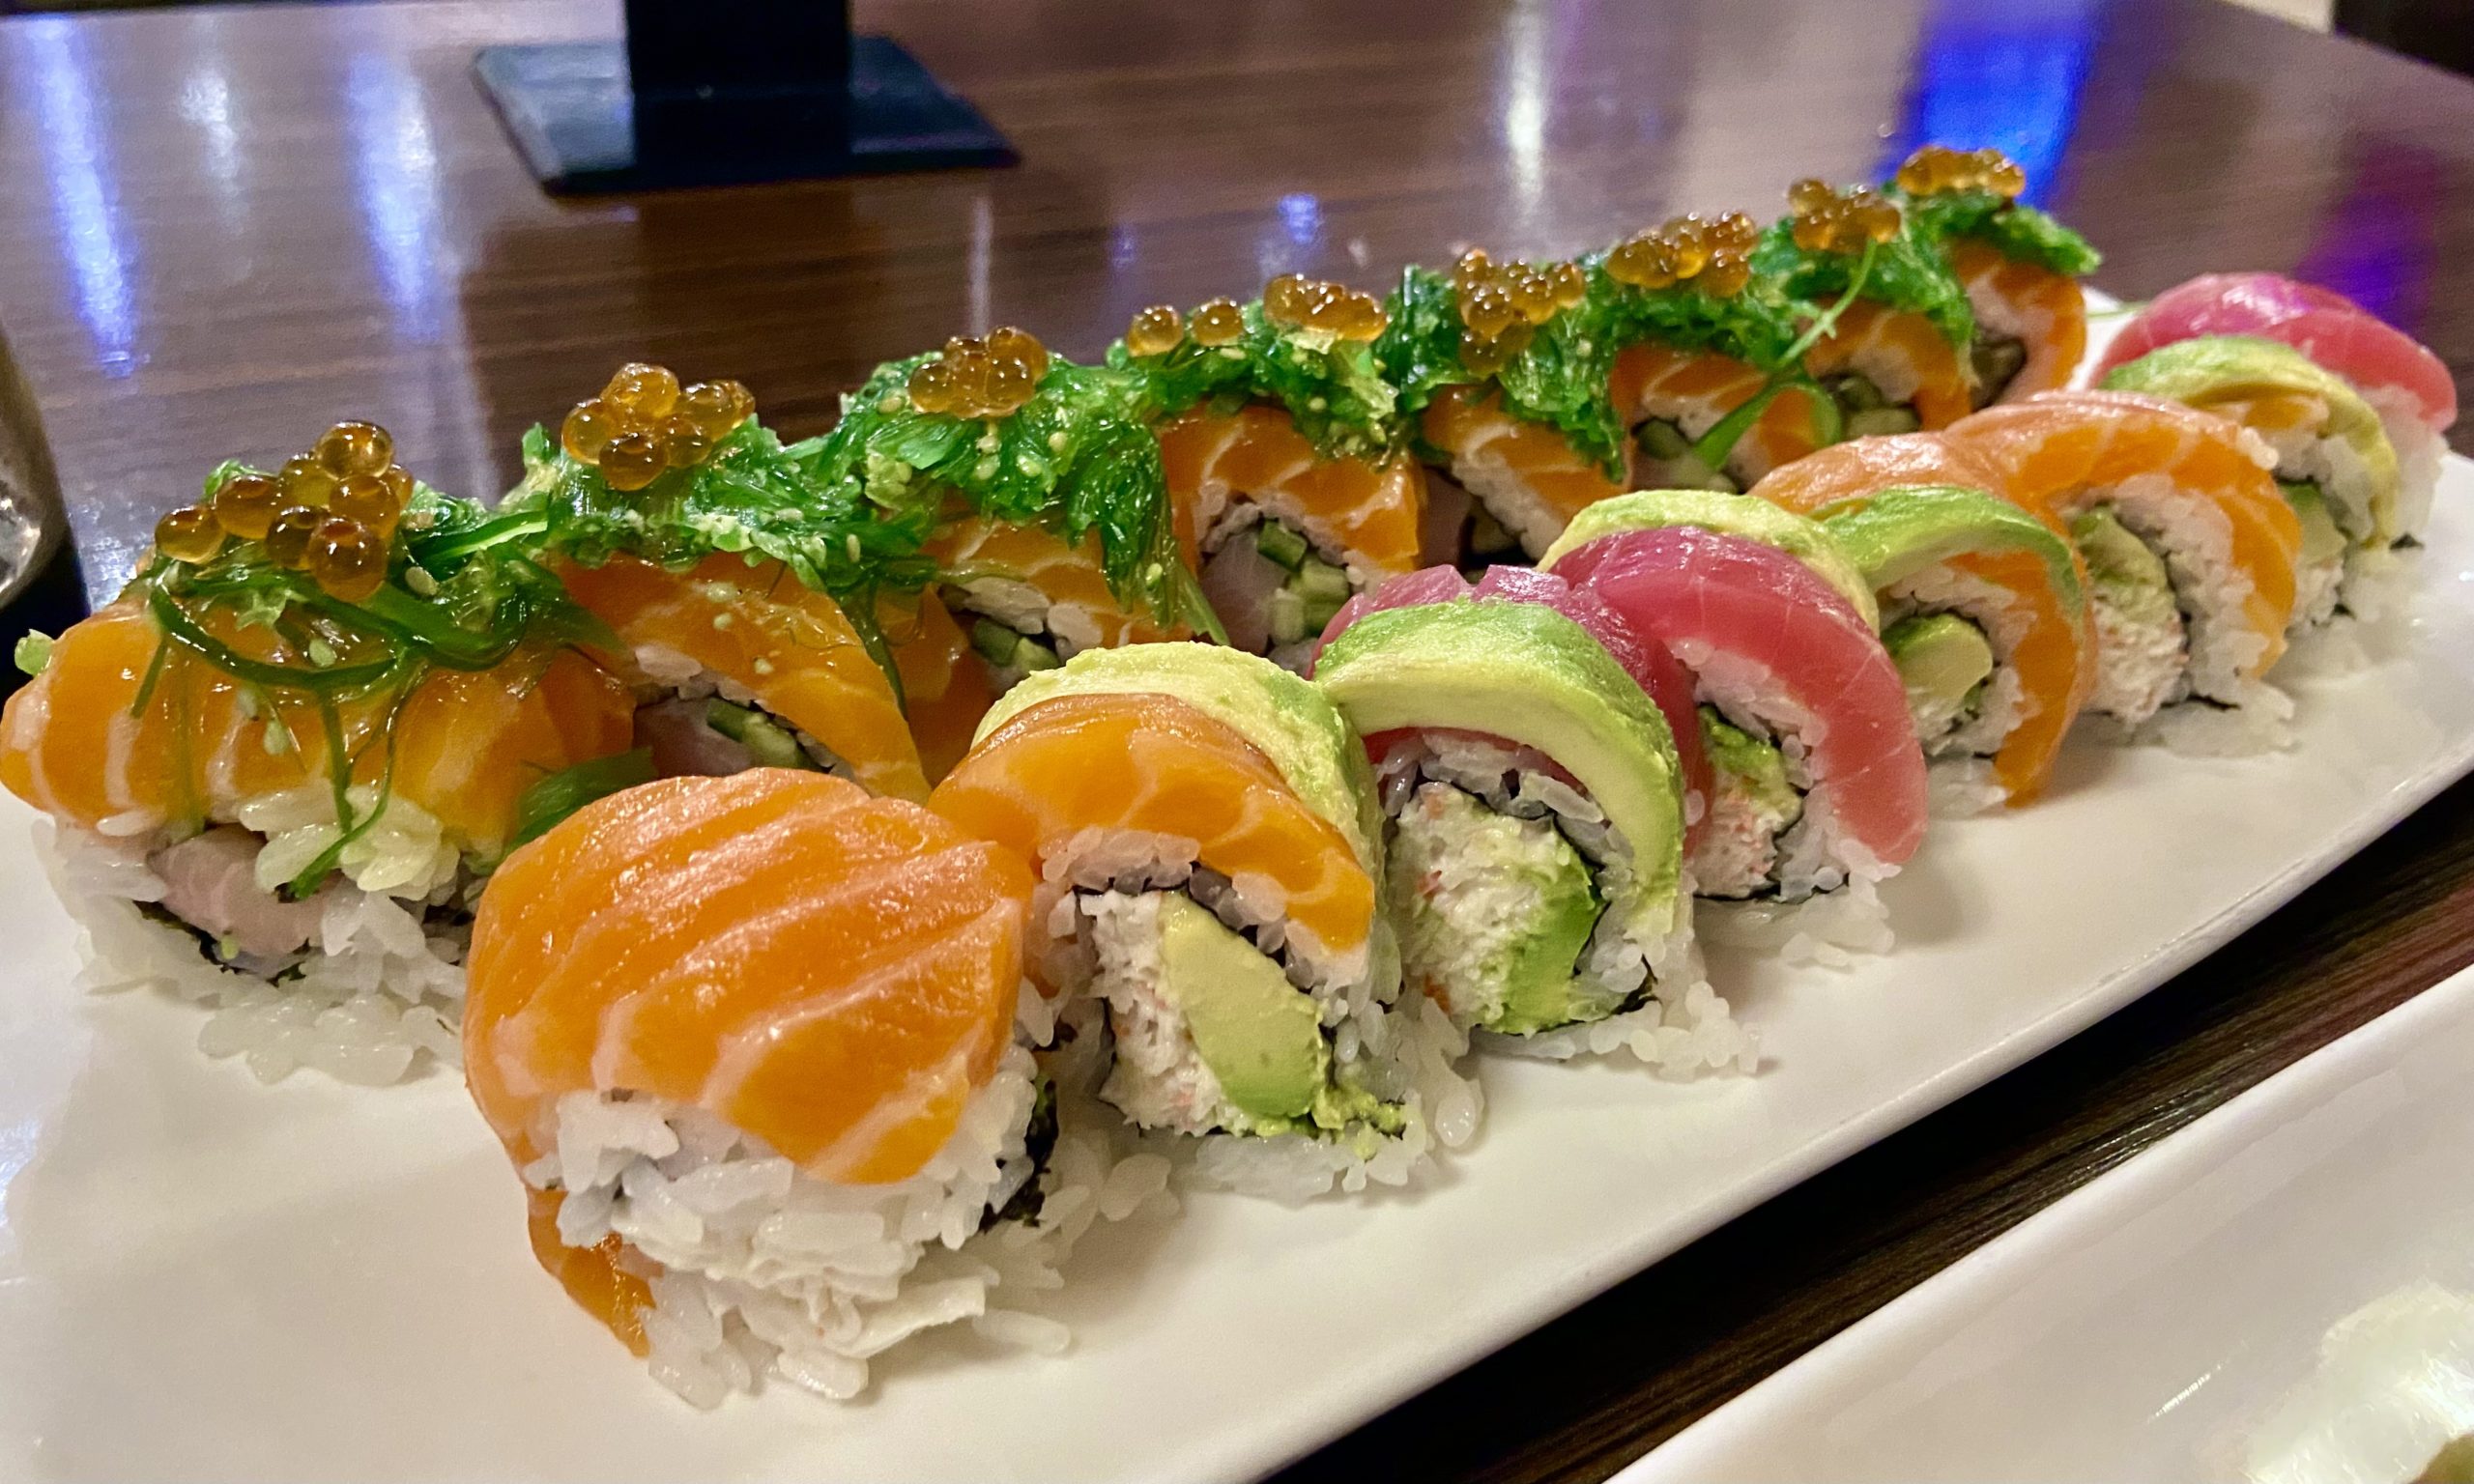
    And yes, I know that photo is not “real Japanese” sushi. Embrace the creativity. That’s the whole point of food after all. 🙂

  • Ketchup Fried Rice (filling for omurice)

    Ketchup Fried Rice (filling for omurice)

    It’s surprising how many Japanese recipes use ketchup.

    Ketchup fried rice is a more modern Japanese recipe that took ingredients introduced to Japan during the post WWII times (aka ketchup) and incorporated it into their cuisine. What resulted is a whole other subcategory of Japanese cuisine that I haven’t really dedicated much time to during this month of Japanese cooking.

    While you won’t likely see ketchup fried rice served anywhere, if you order a “omurice” from any Japanese-style diner, ketchup will likely be used in the rice within.

    This dish is popular with kids in particular, due to the sweetness imparted by the ketchup, but it also works as a flavor variation of fried rice for adults.

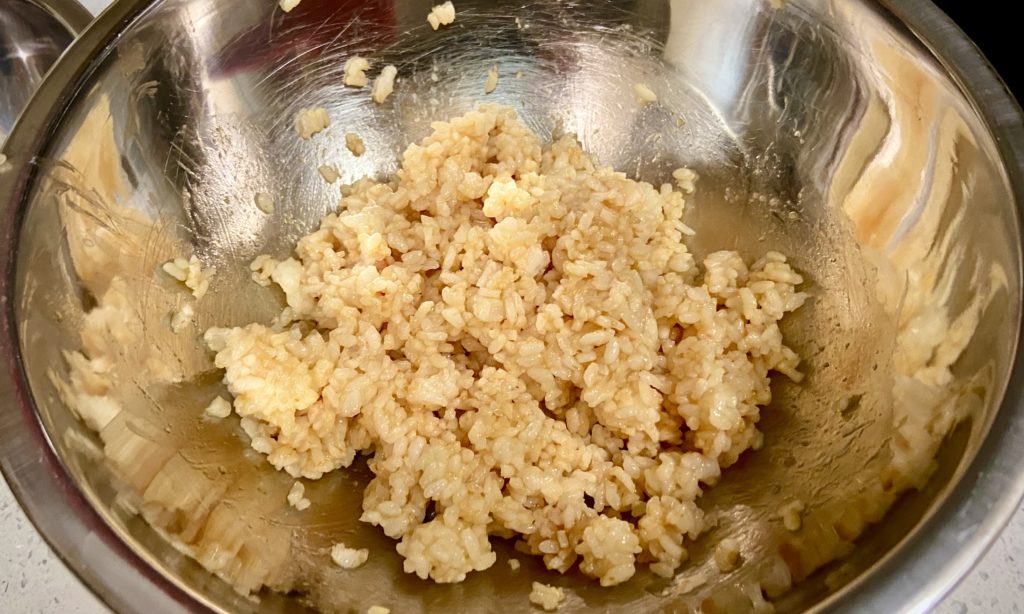
    Similar to the pork and egg chahan, this recipe starts with mixing the rice and ketchup together to break up the short-grain rice clumps and separate the grains. The ketchup helps with this process.

    ketchup-coated rice
    The ketchup helps make it easier to break apart the rice clumps into separate grains
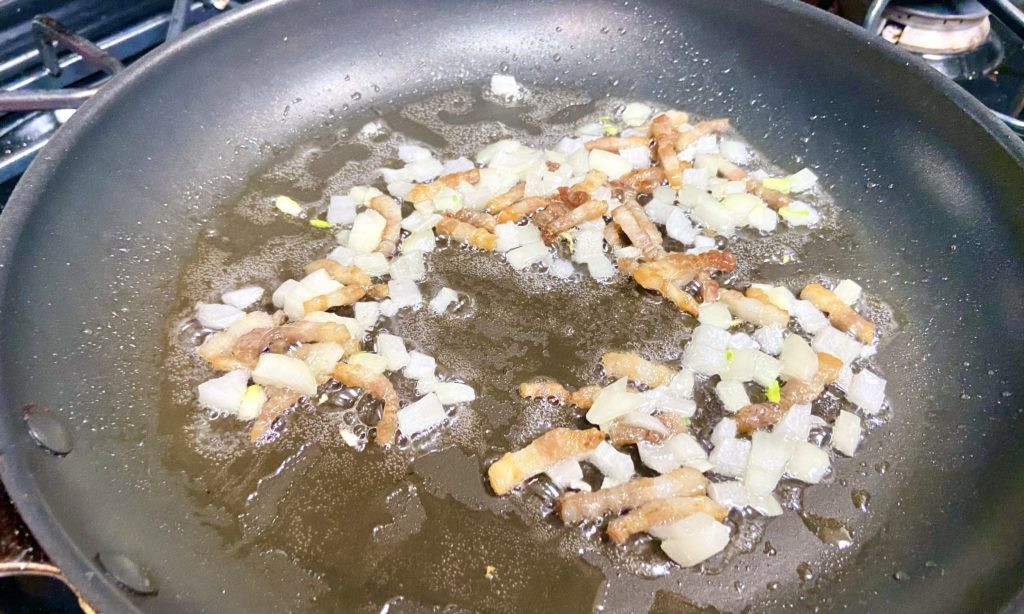
    onions and pork in a pan
    While ketchup fried rice usually has chicken, I had leftover pork belly I needed to use up, so used that instead in this recipe.

    Traditionally, ketchup fried rice has hot dogs or chicken as the protein base, but I used what I had, which was pork belly. I also included some edamame and mushrooms for some color and nutrition.

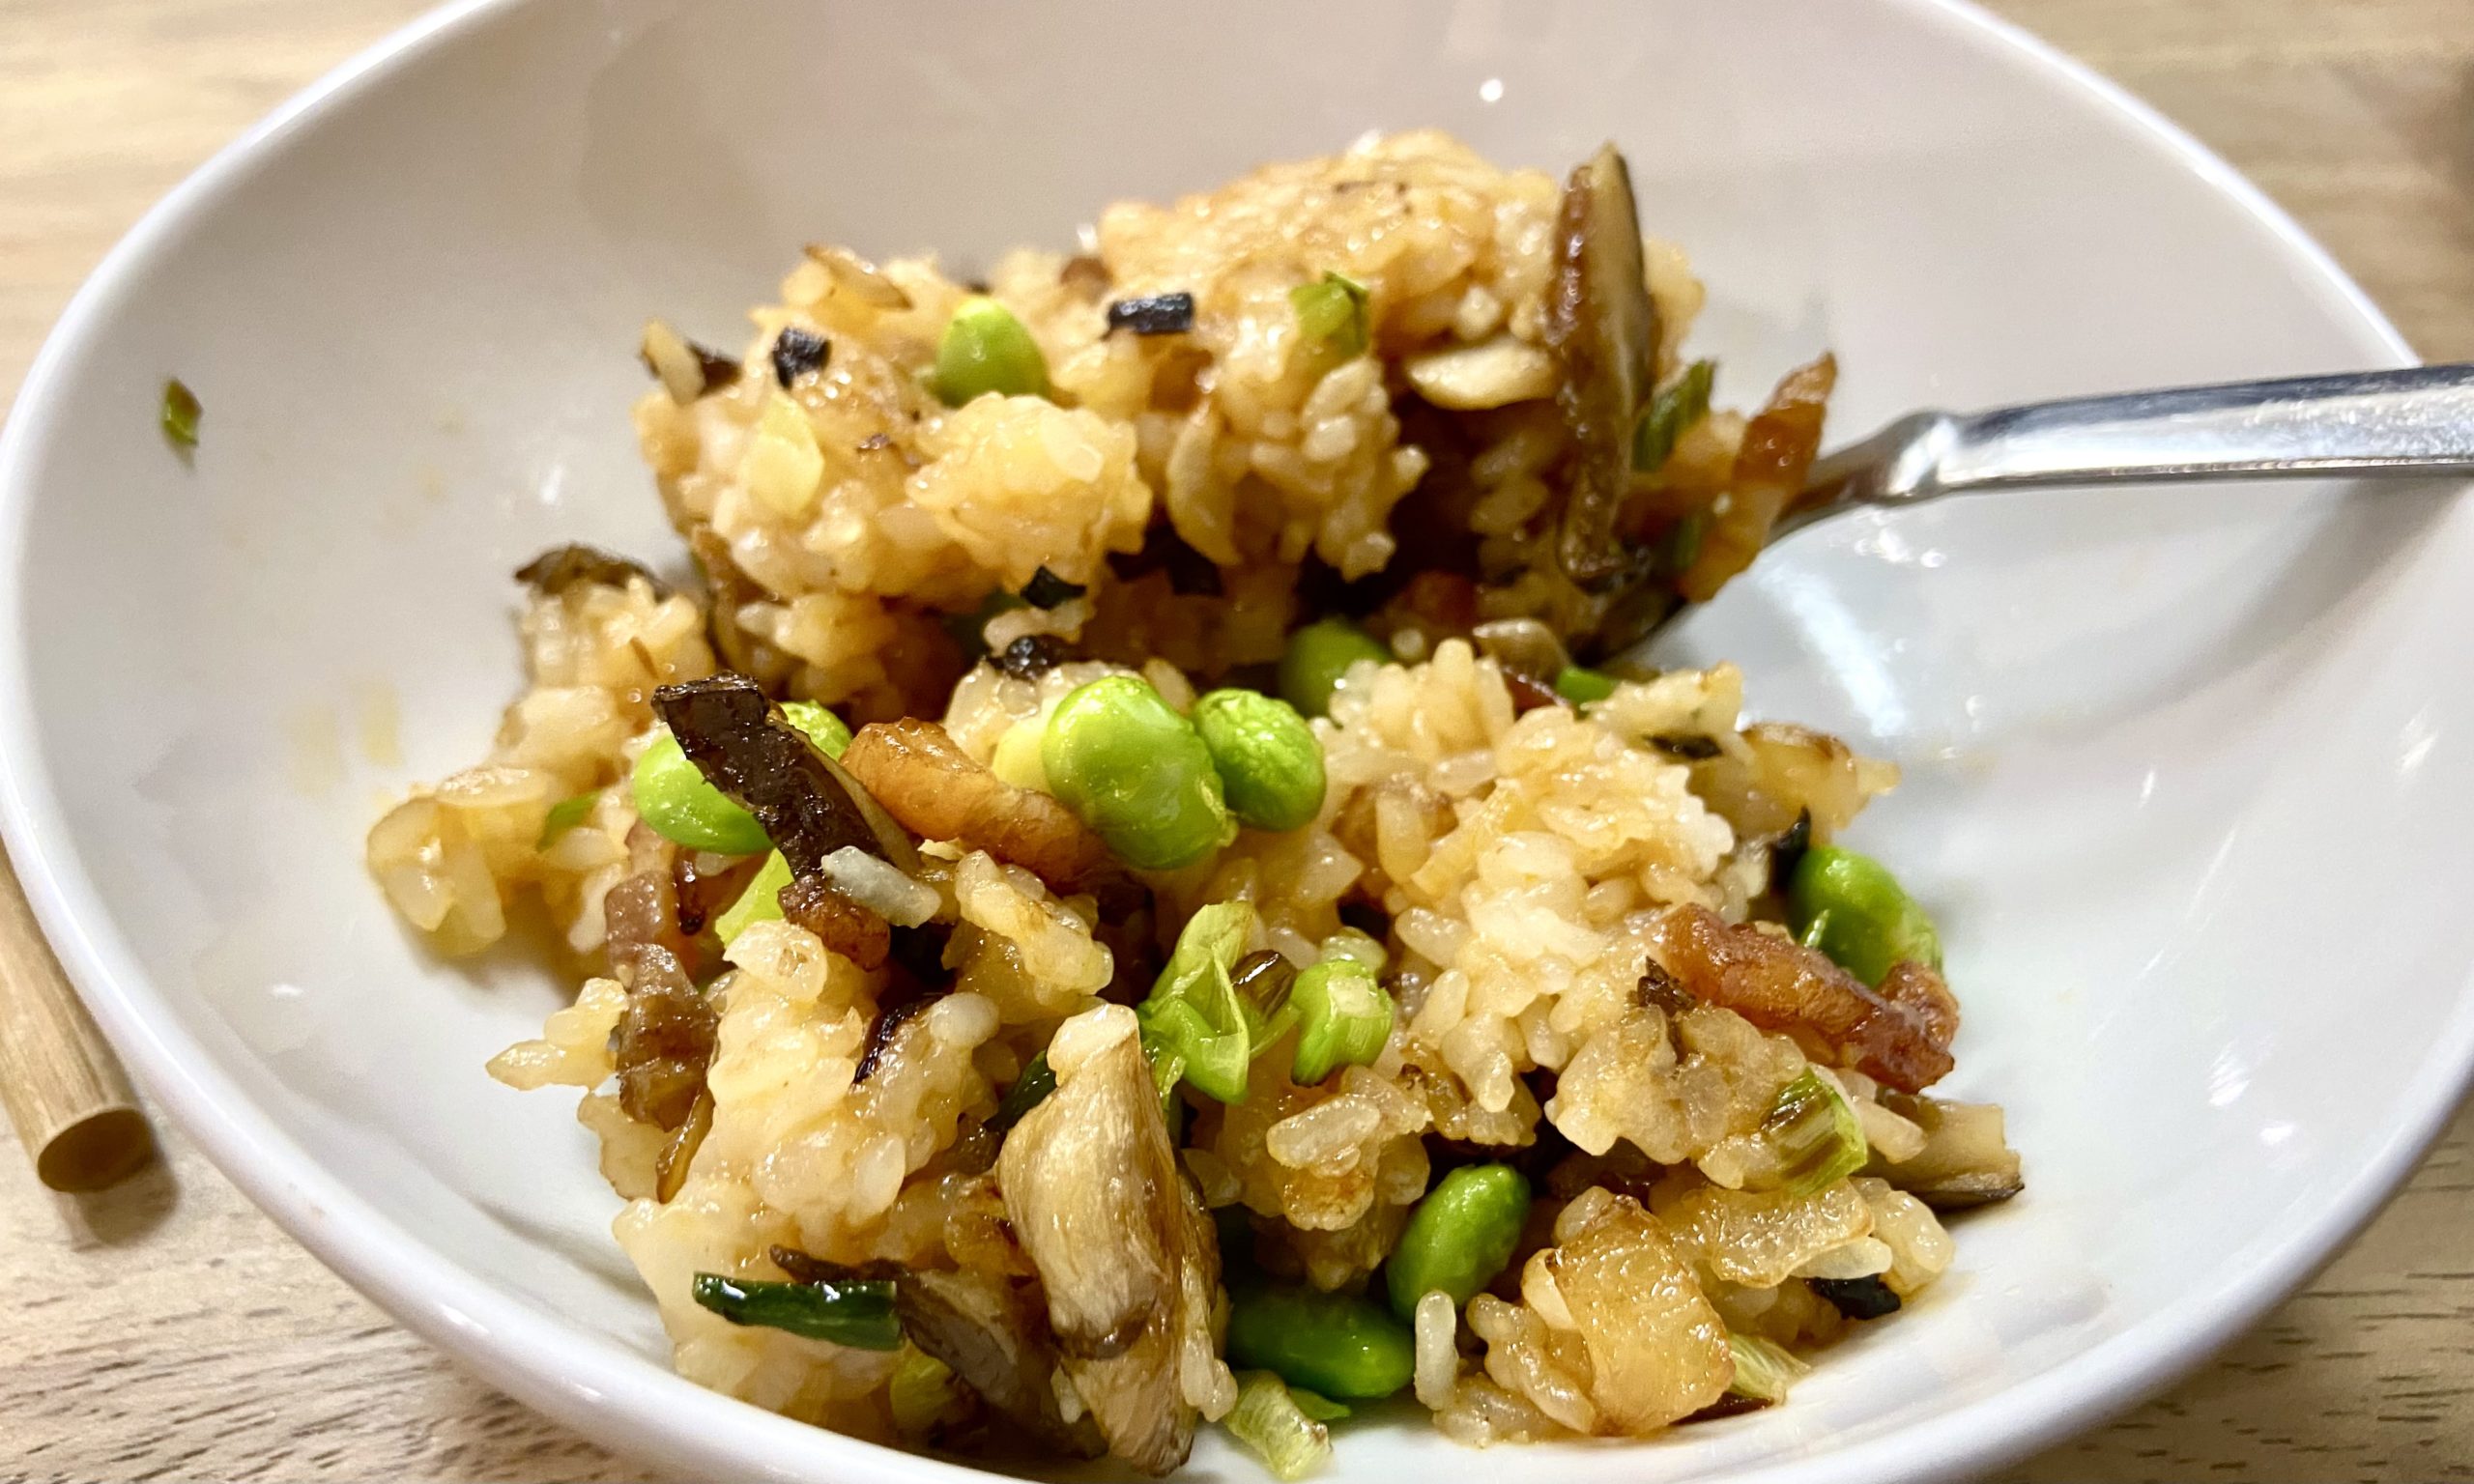
    ketchup fried rice

    Ketchup Fried Rice

    Often used as the filling for omurice, this fried rice variety is popular with kids for its tomato-y sweetness.
    Prep Time 5 minutes
    Cook Time 10 minutes
    Course Main Course
    Cuisine Japanese
    Servings 2

    Equipment

    • 1 non stick pan

    Ingredients
      

    • 1 cup leftover rice
    • 1 TBSP ketchup
    • 1 TBSP oil (optional) omit if using a fatty cut of meat (the fat will come from heating the meat instead)
    • 1/4 cup pork belly
    • 1/4 cup diced onions
    • 1/4 cup diced mushrooms
    • 2 TBSP de-shelled edamame
    • 1-2 TBSP diced green onions
    • 1-2 tsp gluten free soy sauce or tare if you have it

    Instructions
     

    • Combine leftover rice and ketchup, breaking the rice clumps with your hands or a spatula and mixing until all the rice grains are separated and coated in ketchup.
      1 cup leftover rice, 1 TBSP ketchup
    • On medium heat, add the diced pork belly.
      If you are using a less fatty cut of meat, add oil first, then add the meat to cook.
      1/4 cup pork belly, 1 TBSP oil (optional)
    • Add in onions and use your spatula to stir and cook until translucent.
      1/4 cup diced onions
    • Once onions are slightly translucent, add mushrooms. cook until softened
      1/4 cup diced mushrooms
    • Add the ketchup rice and stir and toss with the spatula to cook. Mix to fully incorporate into the dish.
    • Once the rice is mostly dry, add the edamame, green onions, and soy sauce and mix to full disperse the flavorings.
      2 TBSP de-shelled edamame, 1-2 TBSP diced green onions, 1-2 tsp gluten free soy sauce
    • Once everything is fully mixed and the rice is mostly dry, turn off heat and serve!
    Keyword fried rice
  • How to Eat Natto (the tasty way)

    How to Eat Natto (the tasty way)

    Natto is a super healthy probiotic and prebiotic-rich food that is made from fermenting beans. It is sticky, slimy, and to the uninitiated, pretty disgusting (there are plenty of videos on Youtube of people eating natto for the first time and getting repulsed).

    I’ll admit I was not a fan of natto when I first tried it. Even if you get past the texture and visual slimy-ness of a stirred-up packet of natto, the flavor is pungent and somewhat bitter. On its own it’s a difficult flavor to try and swallow, especially if you aren’t used to it.

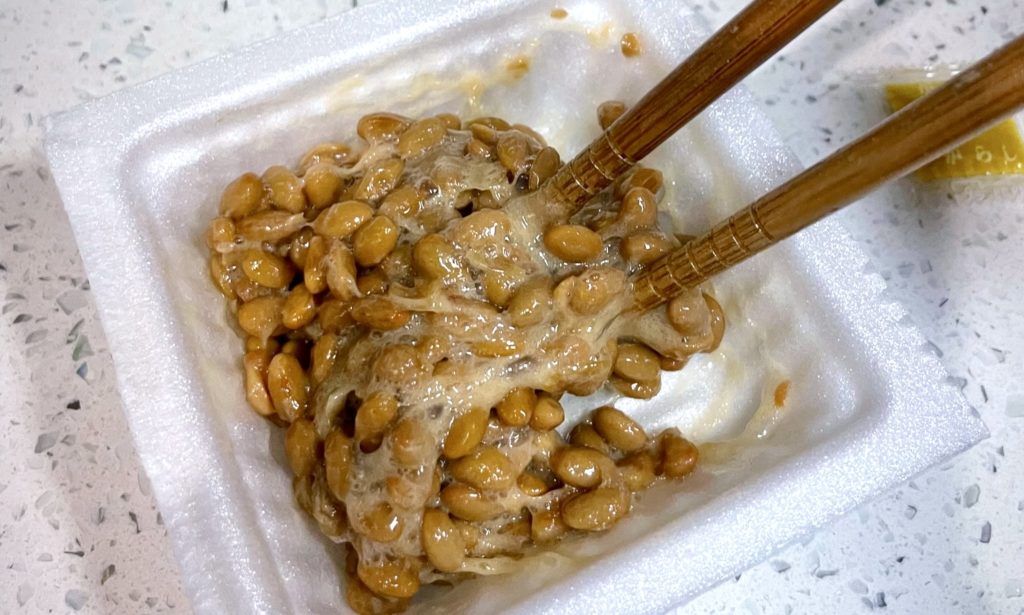
    stirred natto
    Natto, when stirred, forms these white viscous strings between the beans that seem to be a highlight of the dish. You can stir less for less white gooey bits. The nutrition is still the same.
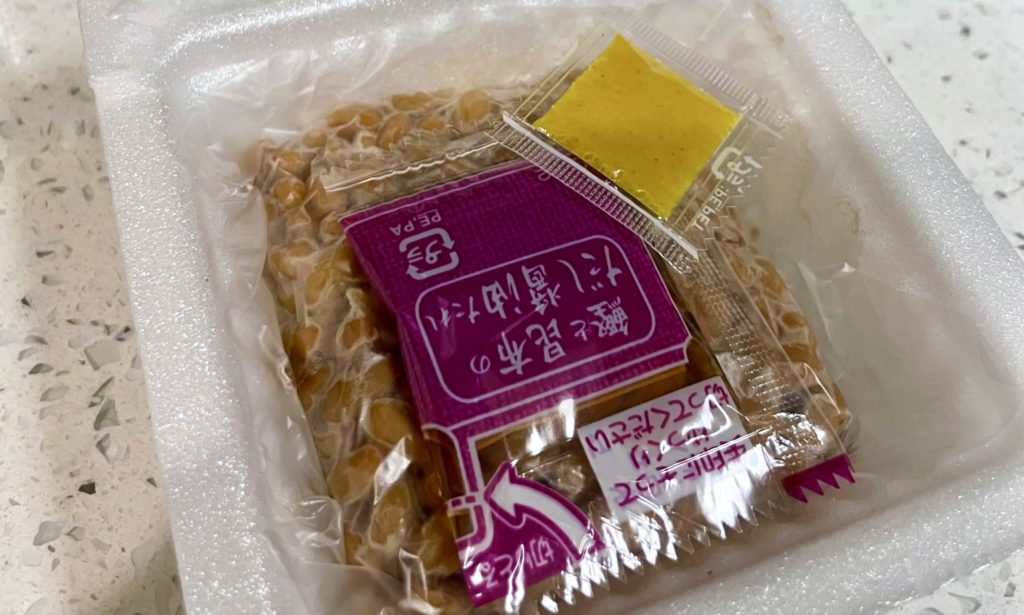
    natto with tare and mustard packets
    Many natto packs come with tare and mustard packets that are meant to be mixed with the natto for better flavor. If you have no issues with gluten, feel free to use the included tare. Otherwise you’ll need to provide your own.

    Traditionally, the Japanese way to eat natto is on top of a bowl of rice, with maybe a runny egg on top of that to mellow it all out. This method works well to mask the texture (the runny egg yolk melds with the natto texture well and the rice helps spread out the “goo” so it feels like just a sauce coating a bowl of rice), but the flavor is still quite pungent.

    This method of eating natto is a great “beginners” way of introducing this probiotic food into your diet and includes omega-3s and iodine from the added ingredients: sardines and seaweed! This rice bowl is a delicious and nutritional powerhouse that’s great for breakfast or any time of day.

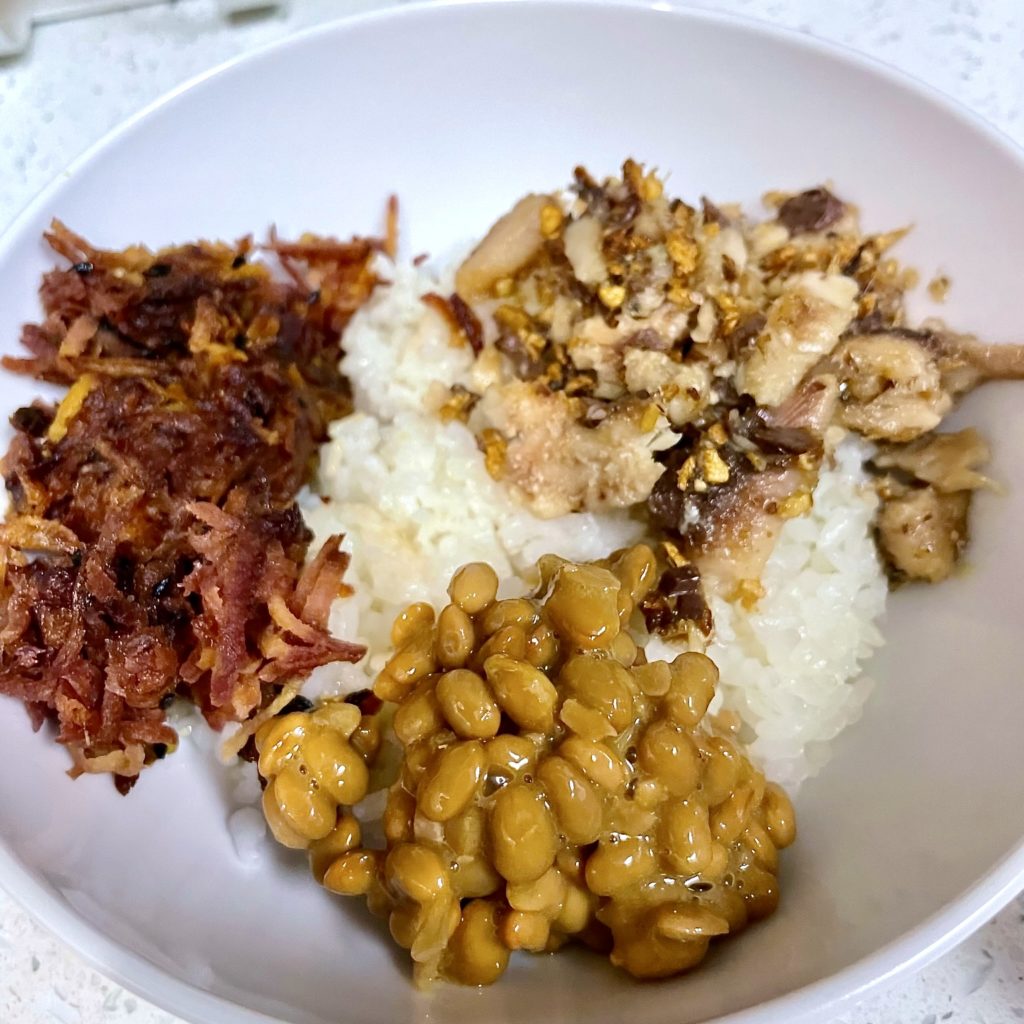
    rice bowl with natto, carrots, and sardines
    Pairing natto with other asian flavors such as ginger and sesame oil, and salty pungent flavors like sardines meld well together and make for a nutritiously delicious bowl

    I also add shredded carrots to give some vegetation to this dish (I happened to only have purple carrots at the time of making this, which is why mine have a reddish hue).

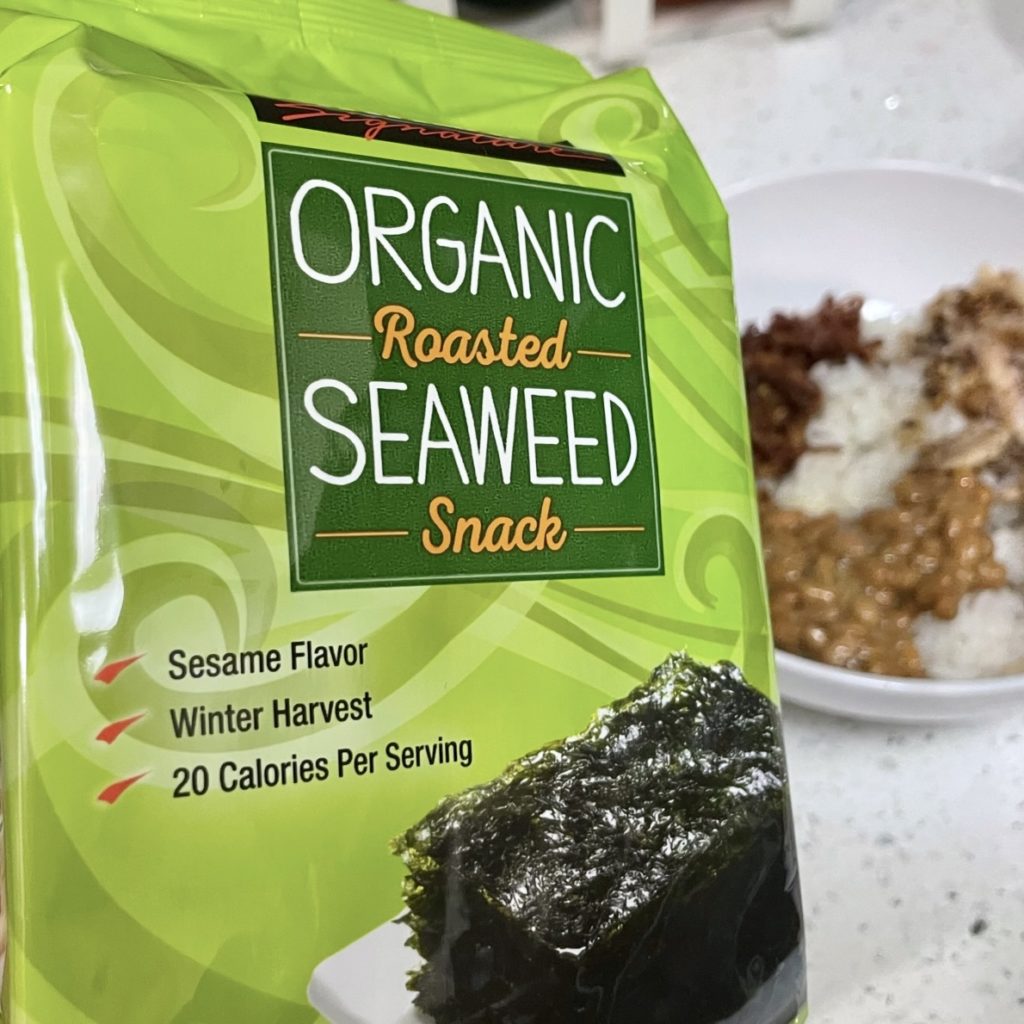
    For the seaweed, I regularly buy Costco’s “Organic Roasted Seaweed Snacks” which are packets of salted seaweed sheets, similar to sushi nori, but thinner and smaller (Koreans use these a lot when eating rice). These can be taken out of the pack and cut smaller to top a rice bowl instead.

    Kirkland Organic Roasted Seaweed Snack packet
    Costco has a great option for salted dried seaweed
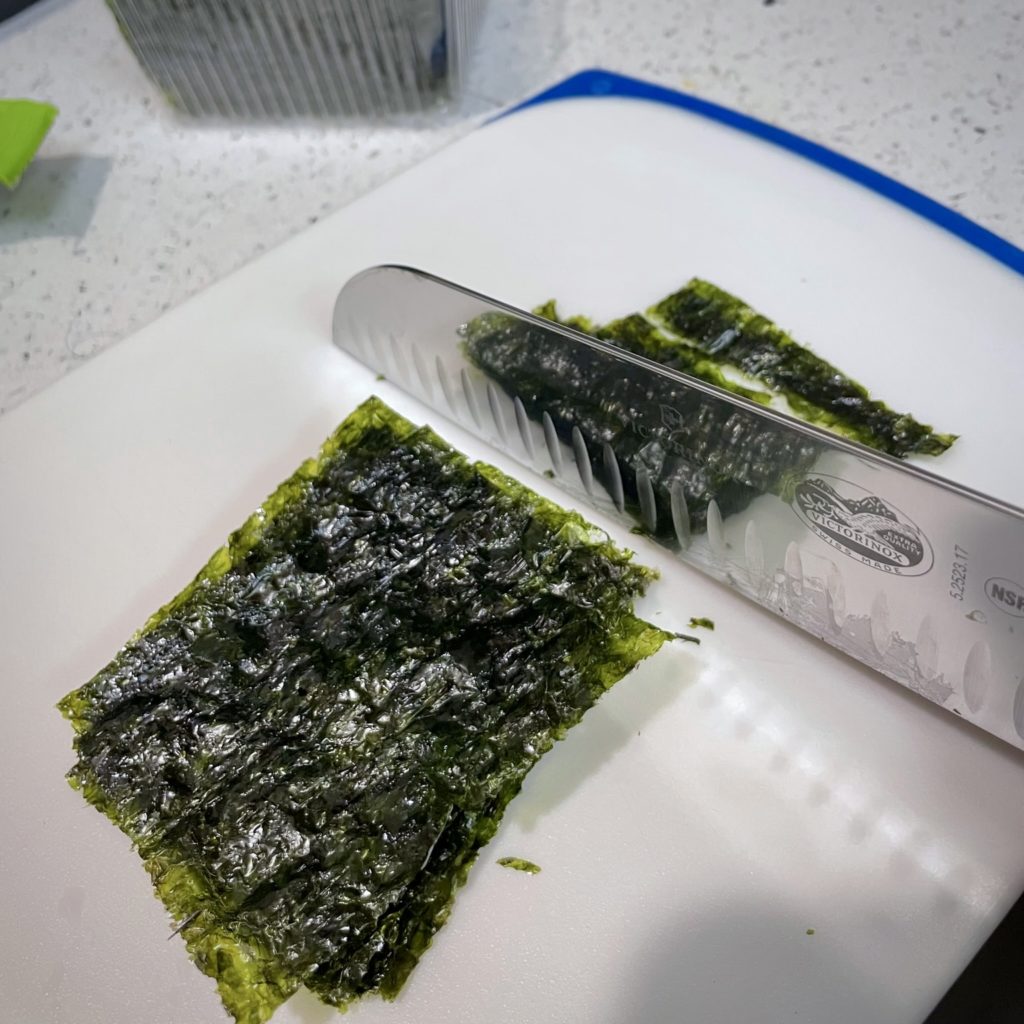
    seaweed sheets being cut into strips
    Seaweed snacks can be cut into strips and used as a rice bowl topping
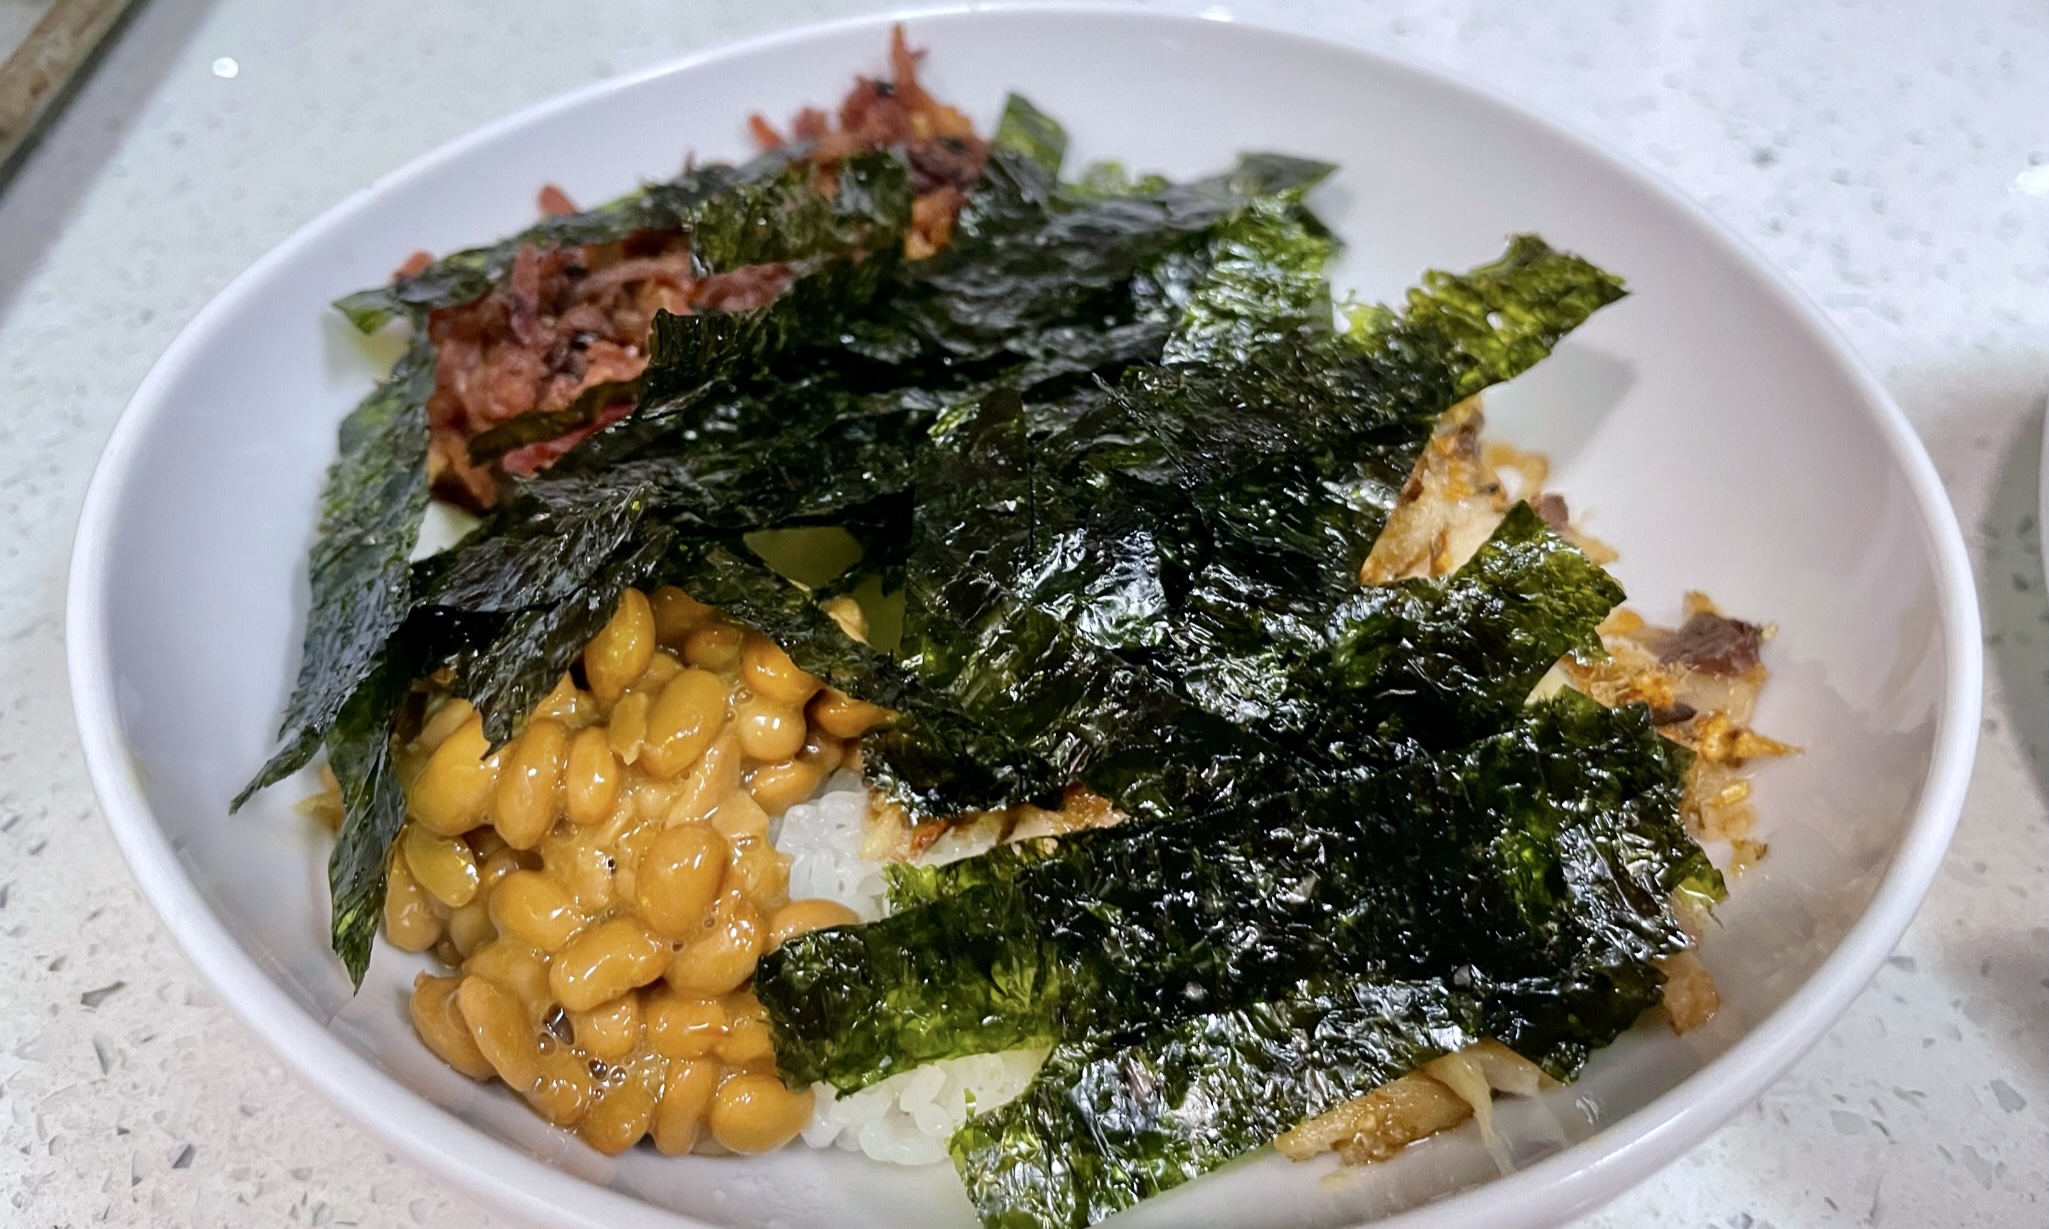
    natto rice bowl with nori seaweed

    Natto & Sardine bowl

    An easy "beginner" way of introducing natto into you diet, the combination of flavors used here meld well with the flavor and texture of natto to create a nutritional and delicious bowl that can be eaten for breakfast or any time of day.
    Prep Time 5 minutes
    Cook Time 10 minutes
    Course Breakfast, Main Course
    Cuisine Japanese
    Servings 2

    Ingredients
      

    • 1 cup freshly cooked rice
    • 1 can sardines in olive oil
    • 1 carrot julienned or shredded
    • 1 packet natto Defrosted at room temp or refrigerated. Most packets are bought frozen.
    • 1 packet nori sheets
    • 1 TBSP sesame oil
    • 1 tsp dried ginger

    Instructions
     

    • In a pan on low heat, add the sardines and olive oil and ginger. Use a spatula to break the sardines apart slightly and cook until slightly crisp. Remove sardines but leave remaining oil behind
      1 can sardines in olive oil, 1 tsp dried ginger
    • Add shredded carrots and toss to cook in remaining oil for about 1 min. Add the sesame oil and use the spatula to stir and coat the carrots. Remove from heat.
      1 carrot julienned or shredded, 1 TBSP sesame oil
    • Open the defrosted natto packet. Using a pair of chopsticks, stir the beans vigorously until the viscous write strings form. If using the tare and mustard packets, add these in now, and then stir to incorporate. Set aside (see note).
      1 packet natto

    Assemble the bowl

    • Add 1/2 cup of rice to each bowl.
      1 cup freshly cooked rice
    • Add the carrots and sardines to the bowls. Add natto to the bowls as well.
    • take a few sheets of nori seaweed and cut into small strips. Top each bowl as desired.
      1 packet nori sheets
    • Serve and enjoy!

    Notes

    If this is your first time, it’s ok to not stir the natto and just serve it directly out of the package. It will be less slimy. I actually don’t know if there’s any nutritional benefit to “activating” the natto, but the slime does help to hold all the pieces of the bowl together when eating it. Anways I hope you enjoy!
    Keyword natto, nutritious

    Note: Selecting Good Natto

    Store-bought natto SHOULD just be soy beans and bacteria (probiotics!) with added tare sauce (soy sauce and sugar mostly) and mustard on the side within the packet, but a lot of brands and varieties add preservatives and other ingredients, which can often include corn or corn-derivative products (maltodextrin, dextrose, high fructose corn syrup). Be sure to check the ingredient list when picking up a pack of natto. Not all brands or packets are made the same!

  • Pork & Egg Chahan (Japanese style fried rice)

    Pork & Egg Chahan (Japanese style fried rice)

    There are many variations of fried rice, and this Japanese one looks and tastes very similar to the typical Chinese pork & egg fried rice. However, the technique varies enough that it warranted its own post.

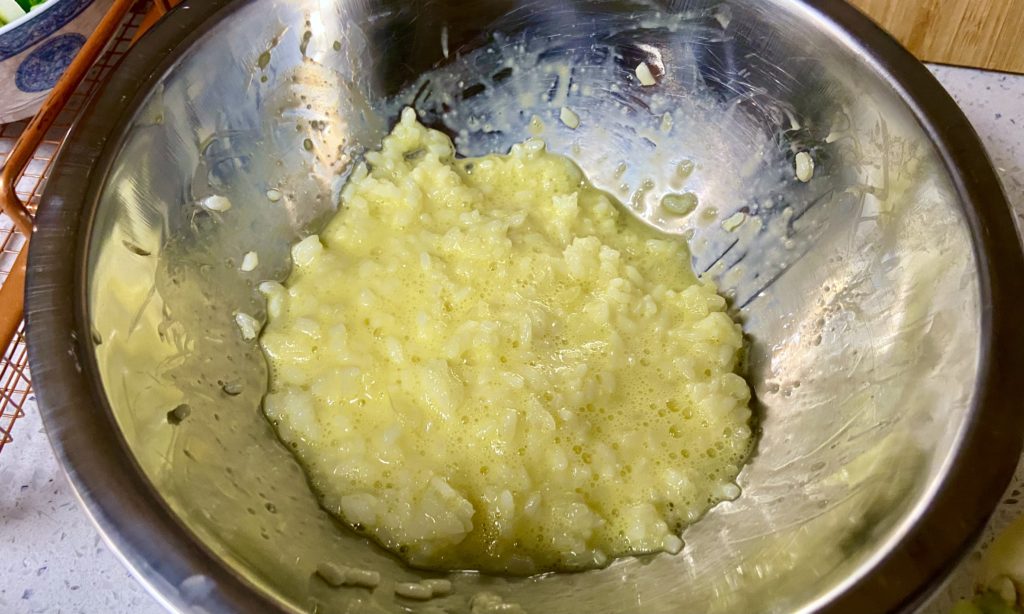
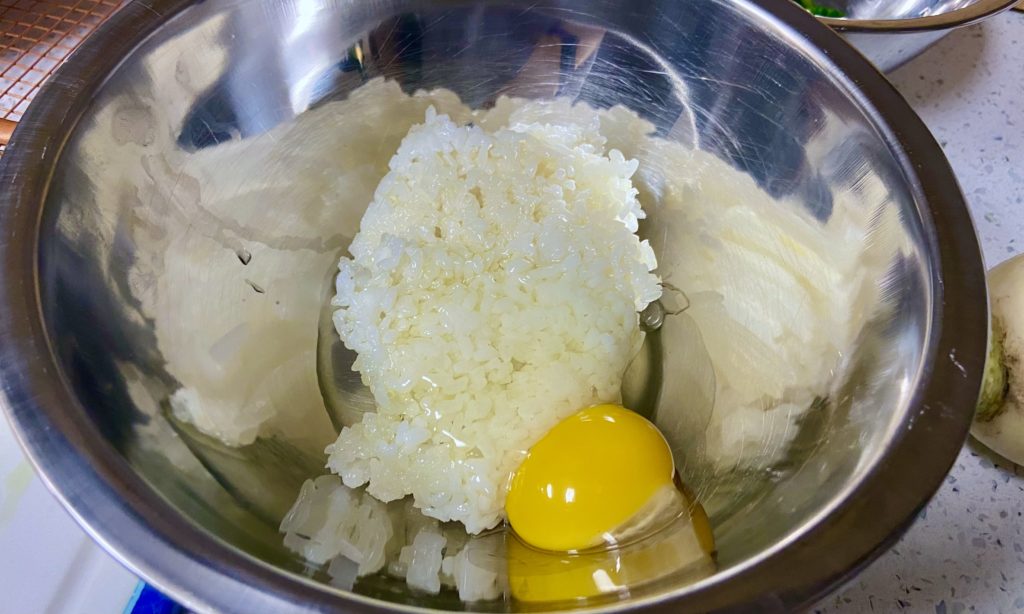
    In this version, we start by mixing the egg with the day-old rice before cooking. This coats the rice in beaten egg, separating the grains and making them more easy for stir frying.

    rice and egg
    Short grain rice tends to clump and stick together. When making fried rice, you want to break this apart into individual grains. Egg makes this process a lot easier.
    rice mixed with beaten raw egg
    Mixing the rice with the raw egg makes it easier to break down the clumps and separate the rice into individual grains

    This technique has become a popular method in recent months, though the Chinese version of “golden fried rice” uses just the egg yolk and turns the rice grains a deep yellow color. This Japanese version uses the whole egg, so there is some separation from the rice grains and egg when cooking, however the texture and flavor is still amazing and a great way to eat up leftover rice.

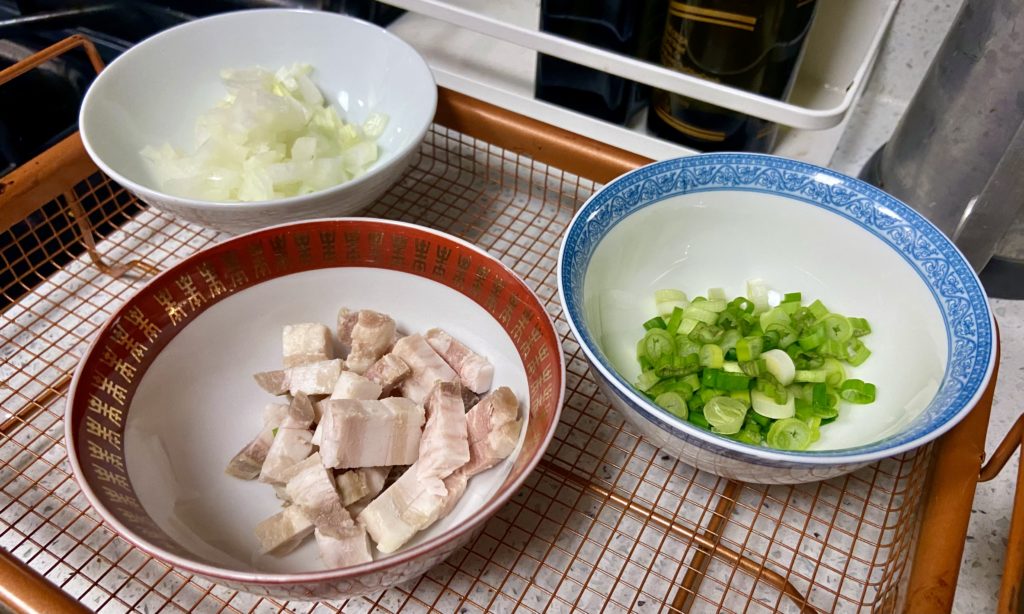
    The rest of the ingredients are fairly specific for this recipe for a solid combination of flavors (onion, green onion, and fatty pork), but if this is for simple home cooking, use up what you have. Fried rice is one of those recipes meant to use up leftover ingredients when home cooking. Feel free to adapt as desired.

    pork, onions, and scallions
    Pork, onions, and green onions are the primary ingredients going into this version of fried rice
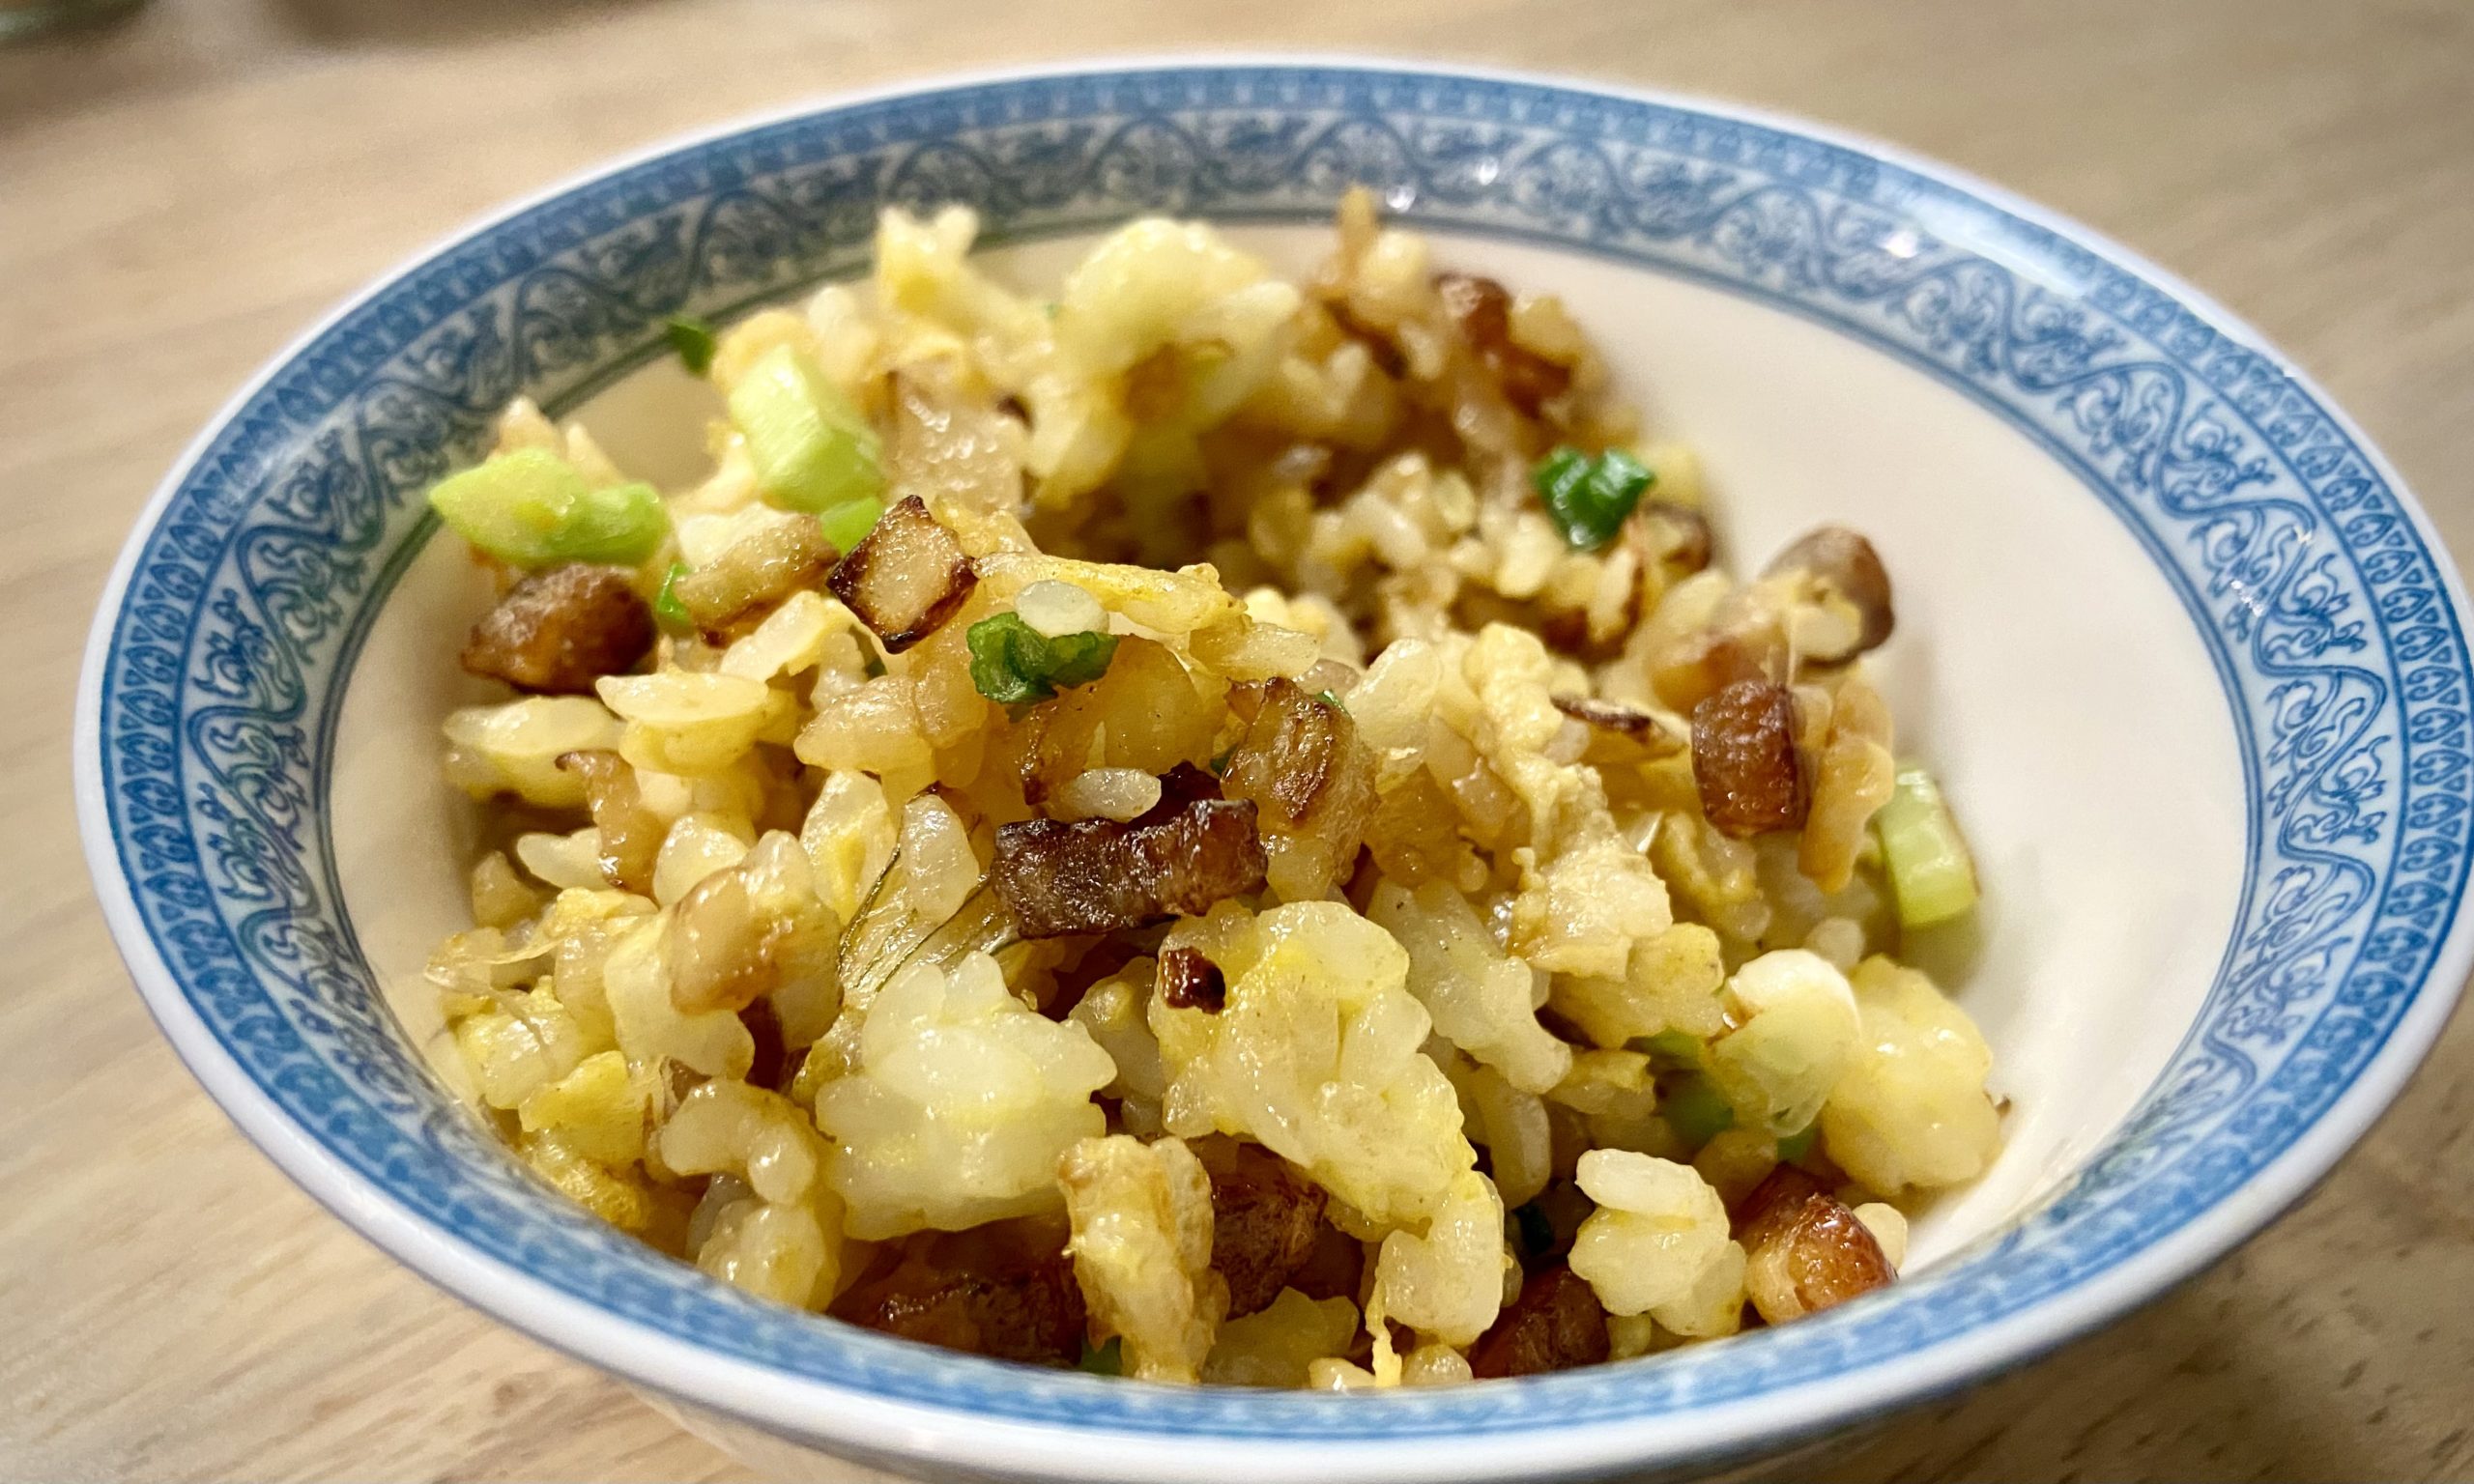
    egg-coated fried rice

    Pork and Egg Chahan (Japanese fried rice)

    A quick and easy fried rice, great for using up leftover rice.
    Prep Time 5 minutes
    Cook Time 10 minutes
    Course Main Course
    Cuisine Asian, Japanese
    Servings 2

    Equipment

    • 1 non-stick cooking pan or wok

    Ingredients
      

    • 1 cup cooked rice
    • 1 egg
    • 1 TBSP oil (optional) unneeded if you are using a fatty type of pork
    • 1/3 cup diced pork belly bacon also ok
    • 1/3 cup diced onion
    • 2-3 TBSP diced green onion
    • 1 TBSP sake
    • 1-2 tsp gluten free soy sauce for saltiness. tare is also good if you have it

    Instructions
     

    • Mix the egg into the cold day-old cooked rice, breaking the clumps down with your hand. The egg should help with this process. Break the clumps down until the rice grains are all separated and the egg fully coats the dish
      1 cup cooked rice, 1 egg
      rice mixed with beaten raw egg
    • In a non-stick pan on medium heat, add the diced pork belly and saute to render out the fat for cooking (if using a leaner type of pork, add oil before adding the pork)
      1 TBSP oil (optional), 1/3 cup diced pork belly
    • Add onions and continue to cook.
      1/3 cup diced onion
    • Once the onions are translucent, add the rice and egg mixture and use your spatula to move the whole mixture around so that the rice is cooked evenly.
    • Once the egg is fully cooked and the mixture looks fairly dry, add in the sake and gluten free soy sauce, tossing to disperse the seasoning liquids evenly.
      1 TBSP sake, 1-2 tsp gluten free soy sauce
    • Add the scallions and give it another toss to incorporate.
      2-3 TBSP diced green onion
    • Turn off the heat and serve immediately.

    Notes

    Ingredient measurements are not exact. Adjust quantities as desired. 
    Keyword fried rice